At this point I am currently working on projects 3, 4, and 6 simultaneously, although I have a few other projects on the burner it has been important to get these ones ahead at this moment. Each project is progressing at a different rate! In most instances I have put a line across the page (in the project reports and sometimes appendices) to show where I have left off since the last report deadline. Please browse through. The appendices have changed a lot too so have a look there. As suggested in the design cycle I have done a bit of 'tweaking' to my overall learning pathway again, responding to change in my situation and needs, I have eradicated my home garden design to focus my attention on projects that I feel will be of more benefit.
Project Report 4
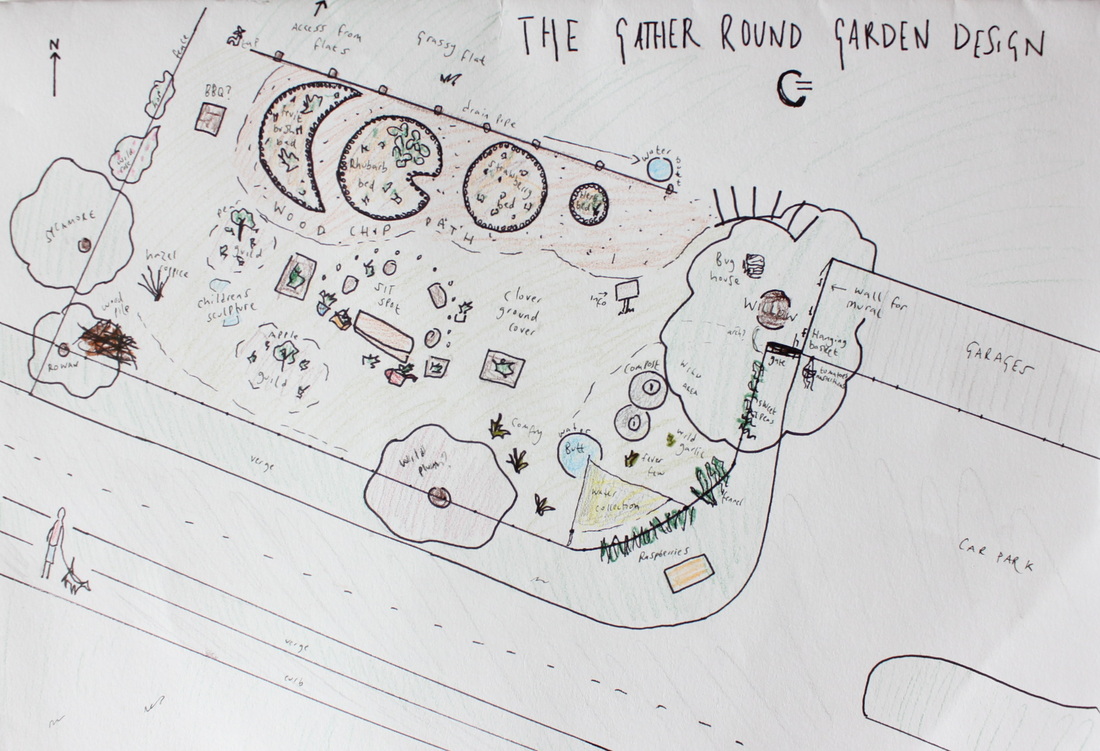
Gather Round Growing Space
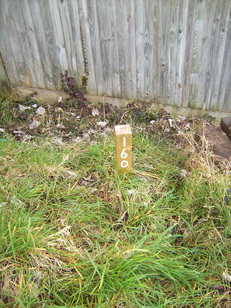
I have been given an allotment space by Matthew, the sustainability officer for Lewes Council. Wow. Welcome to plot 160!
|
I usually try to make my PR's quite succinct and fit the bulk of workings into the appendix, but it seems appropriate to keep a lot of information within the body of this particular report, to show the development and reasoning for anyone in the same shoes as me; a total beginner! |
|
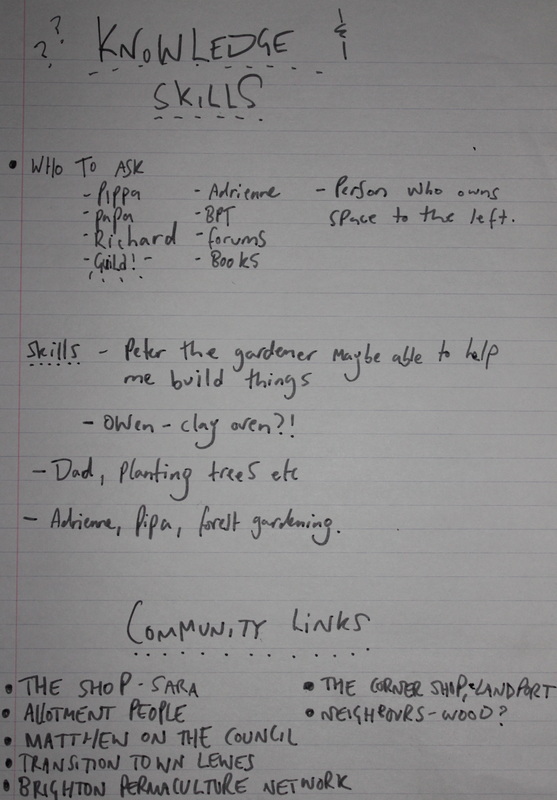
What do I know?
Formally common land, people living around didn’t like it being disused, it has been turned into two allotment spaces. Some pretty large earth works to the slope they have made two terraces, but where the lower one in lovely and flat, the upper one (the one I have) is still quite strongly sloped! Separated by a five foot high wall of sleepers, they’ve also covered the area in a thin amount of pebbles and stuff.
Fertile edges...
Matthew is going to find out who has the bottom allotment space because they are definitely not using it! Also over the fence is another area the same size that is not being used and must have been part of the common land now unused. This is an opportunity possibly for expansion if a project on 160 went well!
Funding…
Being that Matthew is on the council as a sustainability officer he’s pretty certain he could get me some money for the project. Perhaps only a bit but any help is great. Certainly if it had a social element that would really boost my chances here, and it’d be best to submit him a plan before end of March. And certainly there are opportunities for funding from other sources too.
|
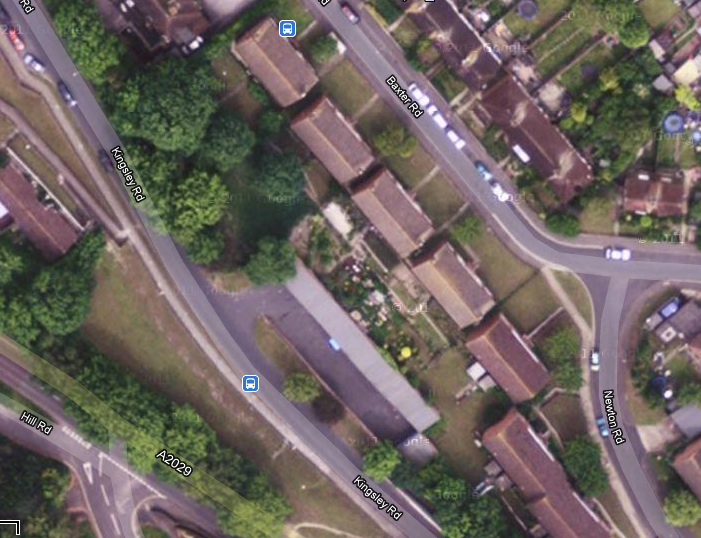
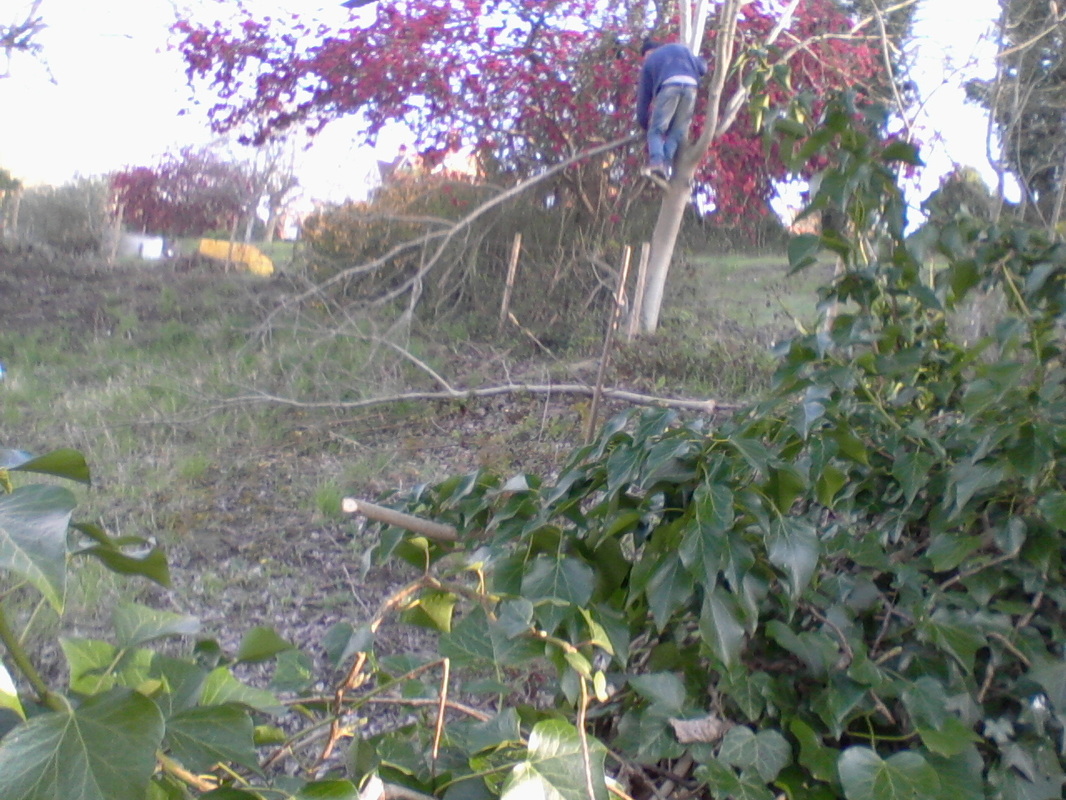
Where it is Five minute walk from my current house... Here you can see the alotment space to the left of the line of garages. It is in quite a big estate called Landport. This area does have quite a lot of allotments but actually they don't belong to the people who live here really. This could be a space that was by and for this estate. This google maps image is quite good for showing the tree cover in summer. Matthew said that the council would be happy to come and take a few trees down, and the people in the houses below would appreciate it too. I'll have to think about that then... |
|
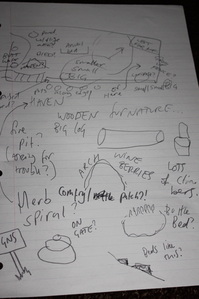
The same day I found out about it, I went up to the site with my camera, compass and tape measure....
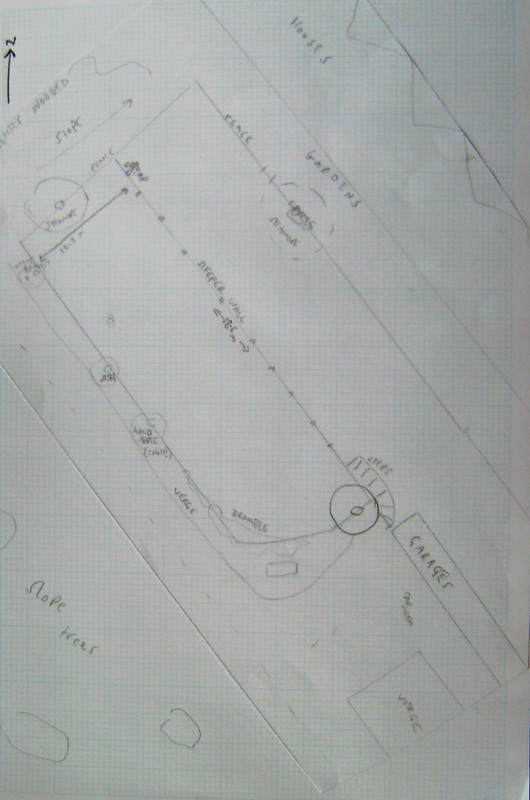
An initial sketch of the area
I am pretty excited about this, and feel very lucky. The same outline as before applies here; keep things simple. And as I am very much a learner, I'll do what I know I can do which is seek people and resources that DO have the answers, because there are so many out there. I'll bring elements together. And that's a way I can think about it to feel much less daunted.
Throughout this diploma I have been getting to know the internet and it's awesome capacity for sharing knowledge, but I have also been growing in confidence and excitement about the potential of knowledge sharing and linking in my life. Doing new things and knowing it can be provided for and importantly, providing for others, in a plethora of ways. This talk I found is about all the things that I am finding fantastic at the moment...thoughts about sharing your learning and accelerating it, gathering knowledge, being totally open for the benefit of the whole and more. With blogging, wikis open source etc there's a great knowledge sharing ethic in the online community. I hope this will seep through into people's daily lives, that there is no point hoarding anything because there is a far more benefit and happiness to be gained from the fluidity of sharing.
Throughout this diploma I have been getting to know the internet and it's awesome capacity for sharing knowledge, but I have also been growing in confidence and excitement about the potential of knowledge sharing and linking in my life. Doing new things and knowing it can be provided for and importantly, providing for others, in a plethora of ways. This talk I found is about all the things that I am finding fantastic at the moment...thoughts about sharing your learning and accelerating it, gathering knowledge, being totally open for the benefit of the whole and more. With blogging, wikis open source etc there's a great knowledge sharing ethic in the online community. I hope this will seep through into people's daily lives, that there is no point hoarding anything because there is a far more benefit and happiness to be gained from the fluidity of sharing.
Work for Project four deadline begins here
Goals Articulation
Using design methods effectively to regenerate and unused space into a beautiful haven to relax in, that has abundant food and wildlife habitat. A space that can be used for a moment of pause or a whole event, the design will stack functions to incorporate elements of succession in both the social and planting aspects; planning for a time when I am not involved in the space, and the time between then and now. It must be a clear and inspiring layout with signs and easily accessible extended resources for people desire to know more. Companion planting and use of guilds will be important to ensure the health of the garden as it is being changed quickly rather than would naturally occur, so mimicking nature is a key task. The aim is to have maximum outputs with minimum inputs, utilizing 80:20.
Why...
Because I want to show what is possible for someone of my age and budget to achieve, for the benefit of more people than myself. I would like some design practice that is public, making a good advertisement of myself and creating value in my work. I have come to the conclusion from visiting community gardens in the area (and there are quite a few!) that there is a hitch they are having that either there is too much work to do and not enough volunteers, thus the energy can be lagging and stressed, or that the people in charge are fairly full on with their volunteers, and often quite exclusive about who is involved, this also creates a strange energy. The outcome of both is that the majority of people still aren't included or inspired. My thought is to be fully inclusive and not expect anything of people. By setting up a garden where the systems are in place and that if it was fully neglected it would actually not be too much of a problem, -in fact it would continue to support diverse habitat- I look for the answer to this conundrum. I hope that simply by a larger quantity of people feeling free in the space and less pressured, and with an accessible communication system set up for it, people may form a self-regulating system...Especially if they can come and pick what they like. Or not! An interesting social experiment perhaps.
Here I feel it most appropriate to use the design acronym OBREDIMET, as it has the opportunity for more evaluation which I feel will be important.
Observe
For this project my key focus is the principal to observe and interact. This will be really important as I have never before created a garden of my very own, so I will really focus on observing other people's methods of working that they have been developing for a long time. I have a lot of respect for this abundance of knowledge stored in others and systems of nature, as well as for my current stage on the path of learning as a beginner.
Observing around the initial idea
I first observed my environment to see where I could use my energy for the most benefit. This, to me looked to be a public disused space. I spent a long time and finally secured a public space. Finding out who to get on my side etc, networking during this initial observation process was a major task, I let myself be quite set back by this, see the appendices for more about the work proceeding this final decision.
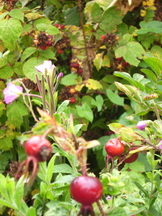
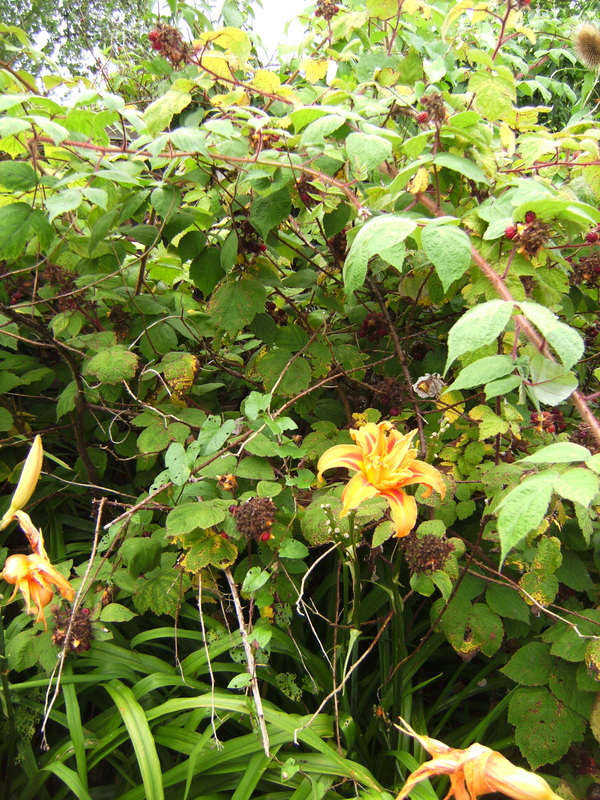
Existing examples
I have been taking advantage of the wealth of knowledge around me, volunteering, visiting and securing mentorship. Please see pictures and thoughts from these visits here. These have been of great value in building my understanding.
As another part of this I have also been securing MENTORS please see the link
I will synthesize the information I have learnt, evaluating it in comparison to my site and goals and will from this be able to show why I took certain choices over others.
The actual site
Now to zone in on the land itself
Observing around the initial idea
I first observed my environment to see where I could use my energy for the most benefit. This, to me looked to be a public disused space. I spent a long time and finally secured a public space. Finding out who to get on my side etc, networking during this initial observation process was a major task, I let myself be quite set back by this, see the appendices for more about the work proceeding this final decision.
Existing examples
I have been taking advantage of the wealth of knowledge around me, volunteering, visiting and securing mentorship. Please see pictures and thoughts from these visits here. These have been of great value in building my understanding.
As another part of this I have also been securing MENTORS please see the link
I will synthesize the information I have learnt, evaluating it in comparison to my site and goals and will from this be able to show why I took certain choices over others.
The actual site
Now to zone in on the land itself
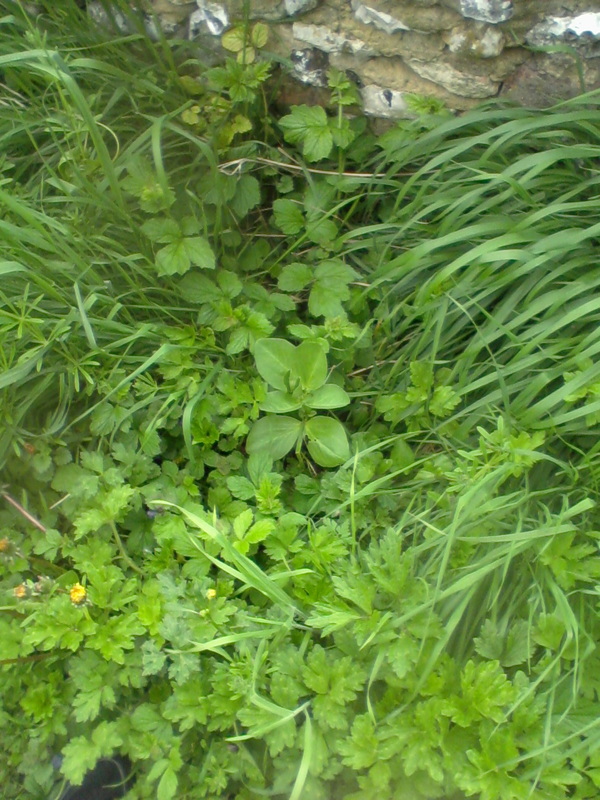
What is there at the moment?
|
plants
wind direction aspect water access wildlife pests Buildings... advantages disadvantages Aesthetics Social, community meaning and potential |
Couch grass, brambles, Dandilions, teasel, sycamore seedlings, saplings from the hedge (unidentified as yet,) ivy, dog rose, nettles
Predominantly North and North East North East facing A tap at the bottom north of the site, flat garage roofs with guttering possible source From top of site down steps, or up through houses Blackbirds, magpies, bumble bees, lots of ladybirds Cats! Lady below feeds the big fat wood pigeons Garages to the side and flats overlooking from the north side Good chance to speak to people and get people interested, less chance of vandalism? Can do things they like Can't leave anything too messy there? I feel nervous, judged, it's different to what most people are used to...something to work on within myself then take to others Feels fairly exposed to the houses but good view of sky and hills, sloped doesn't feel very steady! Entrance is jolly, willow is calming. Generally a good feeling but slightly exposed to people who are on their everyday routine and perhaps not used to this thing they're walking past. ...how to get on their side? To feel silly, open, light, to feel ownership? To explore a strategy for this.... |
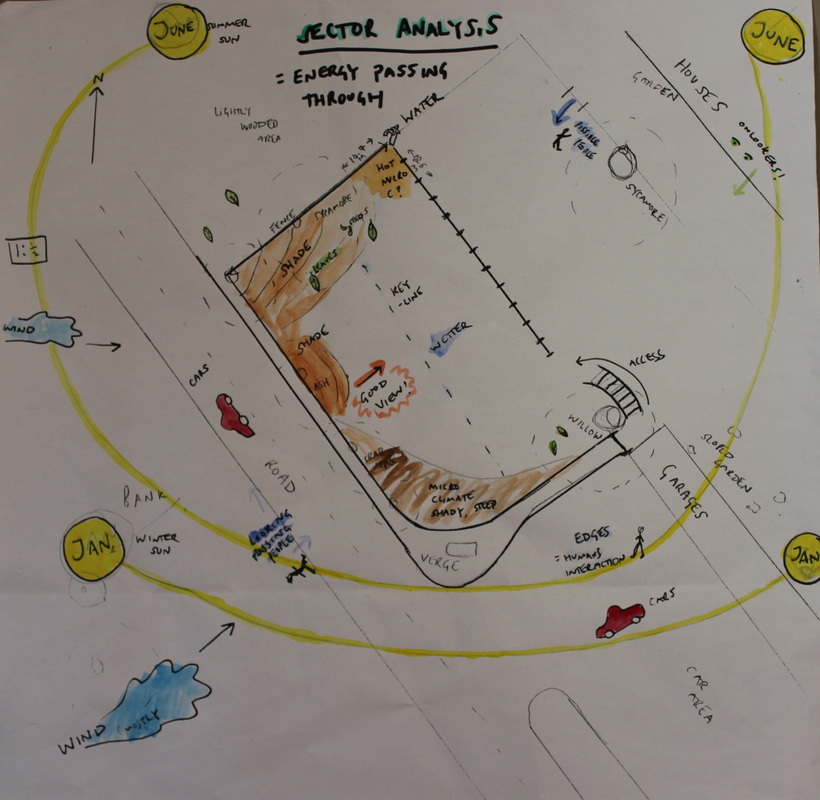
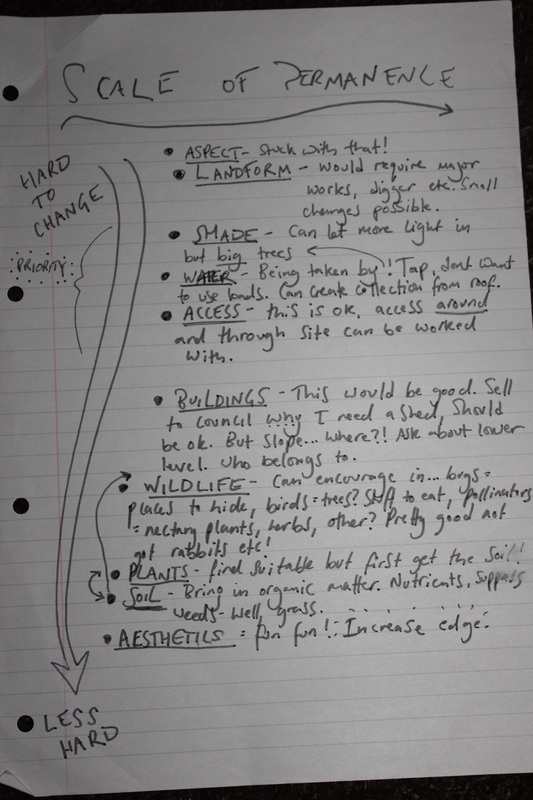
Zones and sector analysis
|
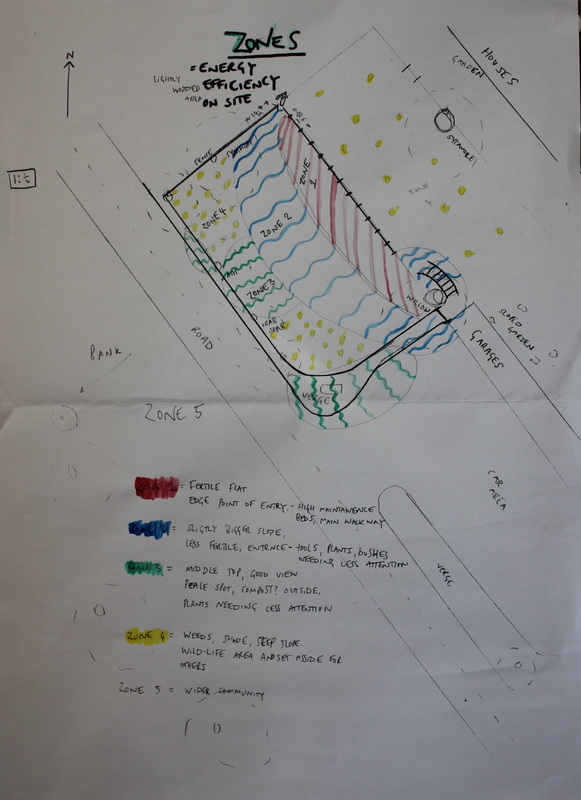
Here I have drawn from my observations a sector analysis of the site. It shows most of the incoming energies and influences.
The designers manual says we want to use these energies to our advantage by placing our zonal components to either invite or deflect these elements. I’m finding it’s becoming clear as I draw this that I would want my zone one and most important plants in the lower level where the most sunlight, water and flat ground is present. All sorts of sensible actions are becoming clear from looking at what I can and cant change in terms of energies passing through.
|
Drawn from observation of what is there I was able to divide the site into different zones and mapped them out. This responds to the influences in sector analysis and creates a great base from which to design to manage incoming energy in an efficient way. “there should be no tree, plant or structure that is not placed according to these criteria and the ground plan” Designers Manual |
|
Soil
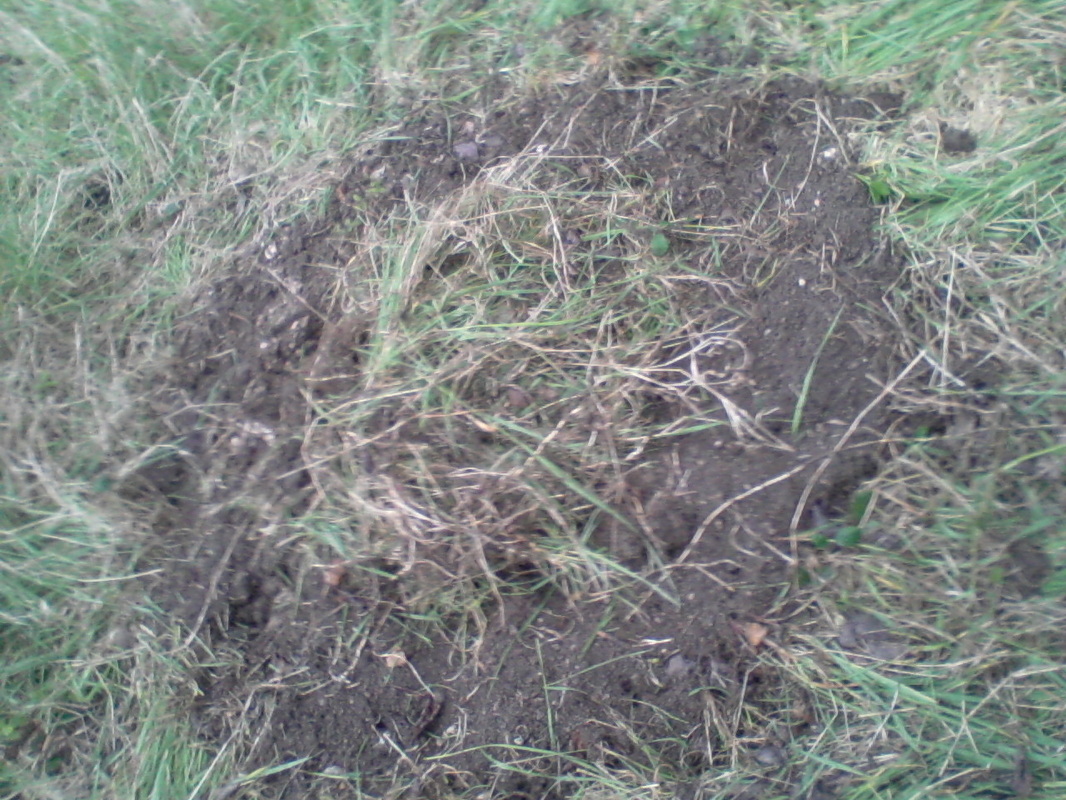
There is quite a bit of moss and some bare ground in the middle of the slope which tells me that the drainage there is quite bad in this area.
This PH test was very exciting at first but turned out to be a little vague. It seemed to come out blue to start with but settle to a light green, from what we could tell it was about PH 7.5 - 8 This is fairly alkaline soil, and plants tend to prefer slightly lower than this...what will I need to add to ensure that the trees and plants I put directly into this soil are happy? 
This test was not that great as it wasn't very accurate, the colour took about a day to settle, and the colour chart was fairly vague. I think it came out at about 7.5
|
I am starting from knowing totally nothing so to go into deep soil analysis is not something I find totally accessible, this site was a good starting point for me. I'm sure the more I understand through trial and error the more enthused I'll be about the complex details of soil type.
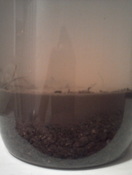
From doing this jar test I see that my soil is about 60% sand (and chalk and large chunks) and the rest loam with a teensy amount of clay. In a rod/ring test my soil would roll to a rod but not bend This tells me my soil is sandy (and chalky!) loam. This means that it doesn't hold water so well, compacts fairly easily but is fairly good for growing. You can see above, however that there is a lot of rubbish in this soil, washed down from the chalky hills and roads. I think the organic and topsoil layer have recently been turned over below. A good lot of organic matter will make it look healthier! |
Main factors to consider:
Soil condition
Keeping down main weeds
Limit work, maximize impact
The idea is for this space to be super easy to set up and maintain. As I will be putting in mostly perennials, the most important thing is improving soil health to ensure their establishment and the system is healthy.
Soil condition
Keeping down main weeds
Limit work, maximize impact
The idea is for this space to be super easy to set up and maintain. As I will be putting in mostly perennials, the most important thing is improving soil health to ensure their establishment and the system is healthy.
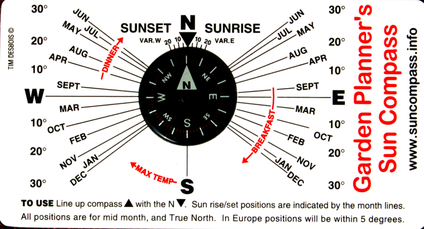
This sun compass was a useful tool for my sector analysis
Boundaries
Physical
The site currently has thick boundaries of brambles and small trees amongst larger ones. I want to make this a more inviting edge by putting in attractive and beneficial plants and opening it up to visitors and light. This is a fertile edge however, and I need to take into account that I need to replace any wildlife habitat I take out with an element that performs the same function as well as those above.
Limiting Factors
time- I dont have much time, the season is moving on and I do not have a year to sit and observe unfortunately, changes that may ordinarily be slow are going to have to happen faster. This will be reflected in my choices in design.
This is not really in keeping with permaculture design to go so quickly so I will need to focus on succession, how am I going to pass this on, take it forward afterwards? My boundaries (ie where I stop working on it) need to be fertile edges where I can enthuse others an take an interest in it, and set up plants that will develop with little input. I need to think about tools and methods to do this.
Internet, causing a stir locally and research into successional planting are just a few...
Strategy is very important here, and I need to choose my plants with care for the intended purpose.
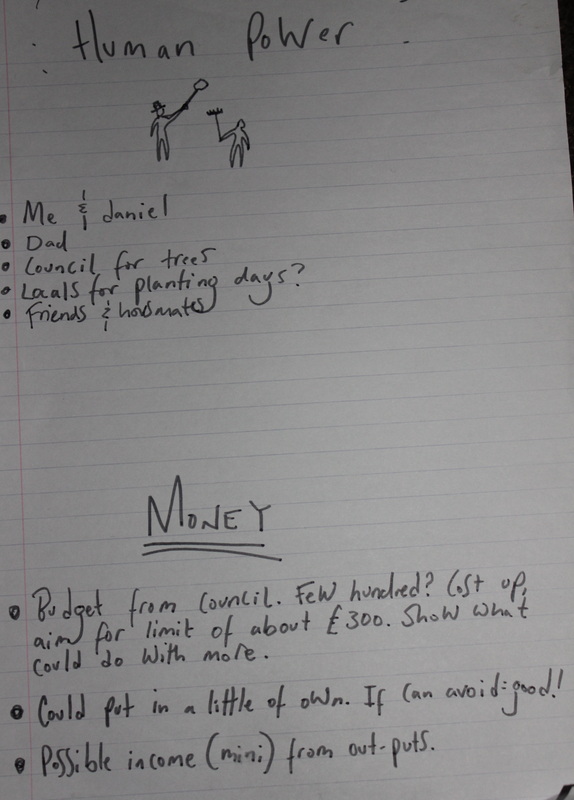
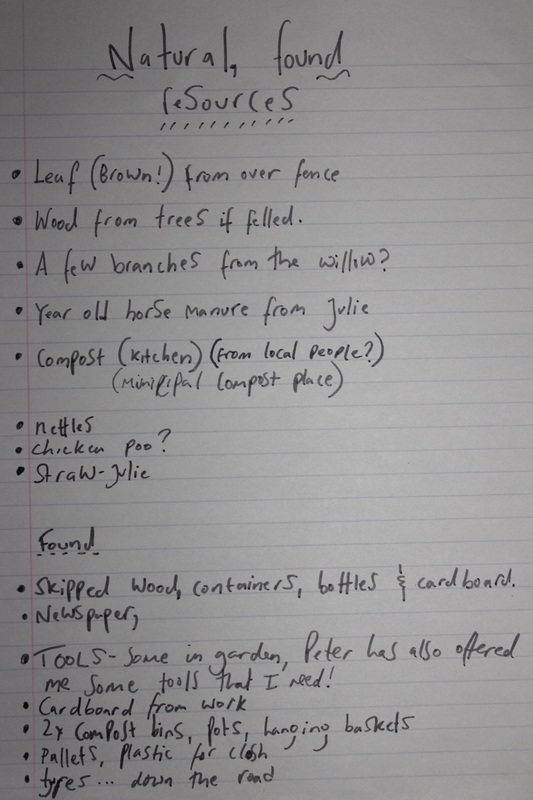
Resources
I brainstormed the resources I have....
For a list of the resources I have been using please keep checking the appendix...many of the things I have researched are there...
For a list of the resources I have been using please keep checking the appendix...many of the things I have researched are there...
|
|

Evaluate
SWOC analysis
Strengths
Right time of year to get going
private yet public
Lots of people to get advice from
Weaknesses
not very accessible, steep
fairly shady
my lack of confidence in the community part of it, of getting people involved, being judged on performance...
Opportunities
money from council
possibly more space/ opportunities
Chance for speed learning, excuse to ask stangers with knowledge for help!!
Get given items for free because for community
Constraints
time
Money, can't spend billions
Soil, shade, slope
How can my design accommodate these considerations?
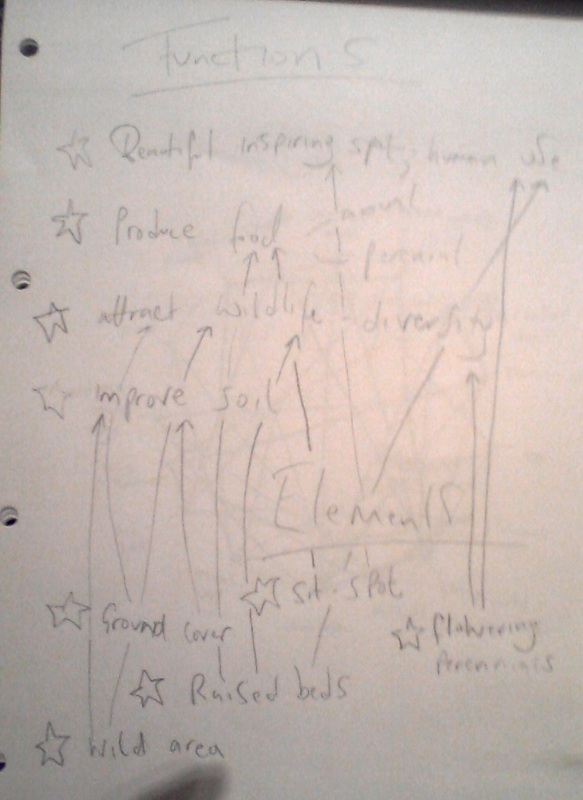
Identify functions to fulfill my goals based around the sector analysis, then I can find the elements that will supply these functions.
Every element should serve more than one function
Every function should be served by more than one element
Some examples of workings and thoughts below
Strengths
Right time of year to get going
private yet public
Lots of people to get advice from
Weaknesses
not very accessible, steep
fairly shady
my lack of confidence in the community part of it, of getting people involved, being judged on performance...
Opportunities
money from council
possibly more space/ opportunities
Chance for speed learning, excuse to ask stangers with knowledge for help!!
Get given items for free because for community
Constraints
time
Money, can't spend billions
Soil, shade, slope
How can my design accommodate these considerations?
Identify functions to fulfill my goals based around the sector analysis, then I can find the elements that will supply these functions.
Every element should serve more than one function
Every function should be served by more than one element
Some examples of workings and thoughts below
stacking functions. I also looked at succession and realized that many elements perform multiple succession functions...
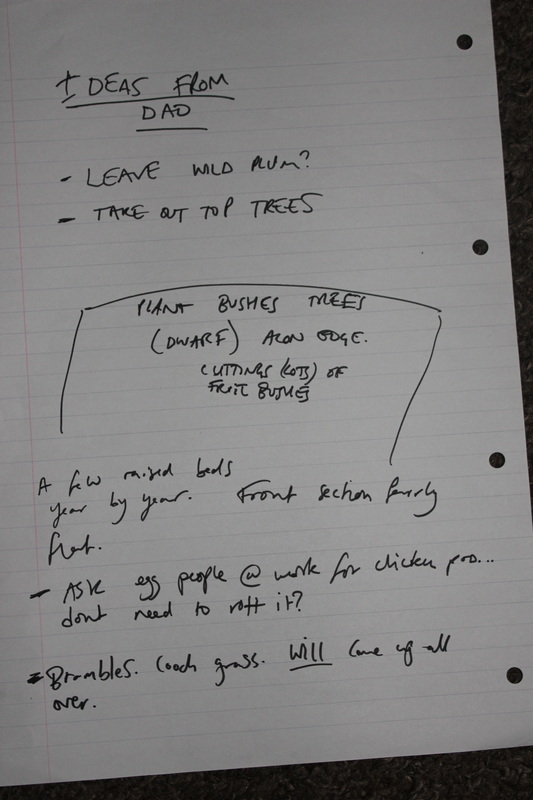
Looking through my notes from mentors and visits I made lists of good ideas to analyze if they fed into my design goals
|
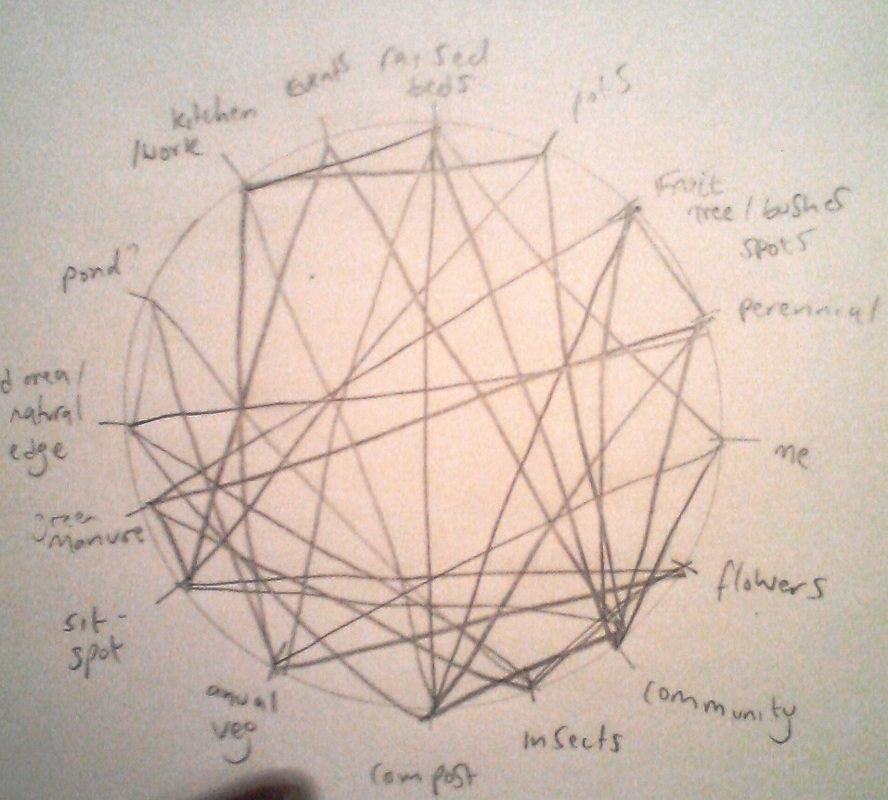
This is a great tool for seeing the connections between elements, it informs placing nicely. I can see from doing this how the elements are interconnected. For example many people think that the compost area should be at the bottom of the garden, but seeing how many interactions happen with it it's clear that closer to the centre would be a more placement!
Asking many people for advice...
|
I've arrived at these conclusions for design by looking at the space I have in comparison to my goals articulation and then by doing research into other sites like this and seeing what they do. I have taken ideas from gardens I have visited and examined why they are good examples and appropriate to incorporate in my design.
Brainstorming, it's creative too, and a lovely pick and mix of fun elements!
|
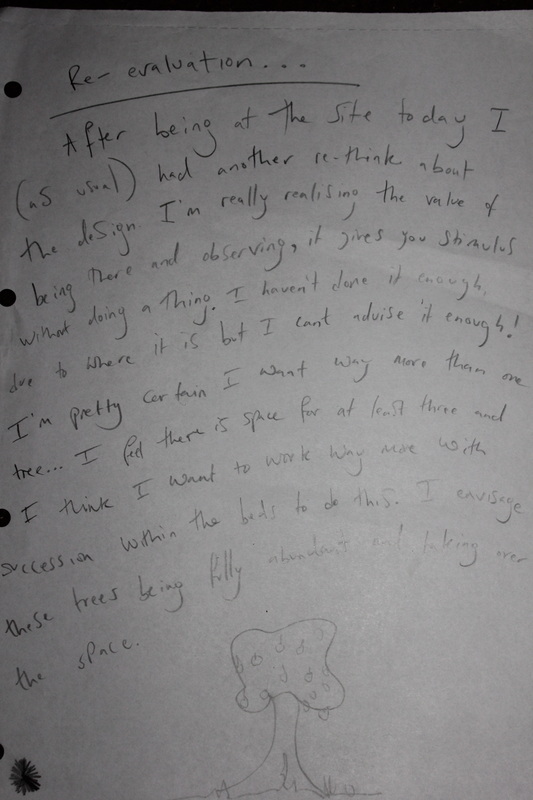
Re-evaluation
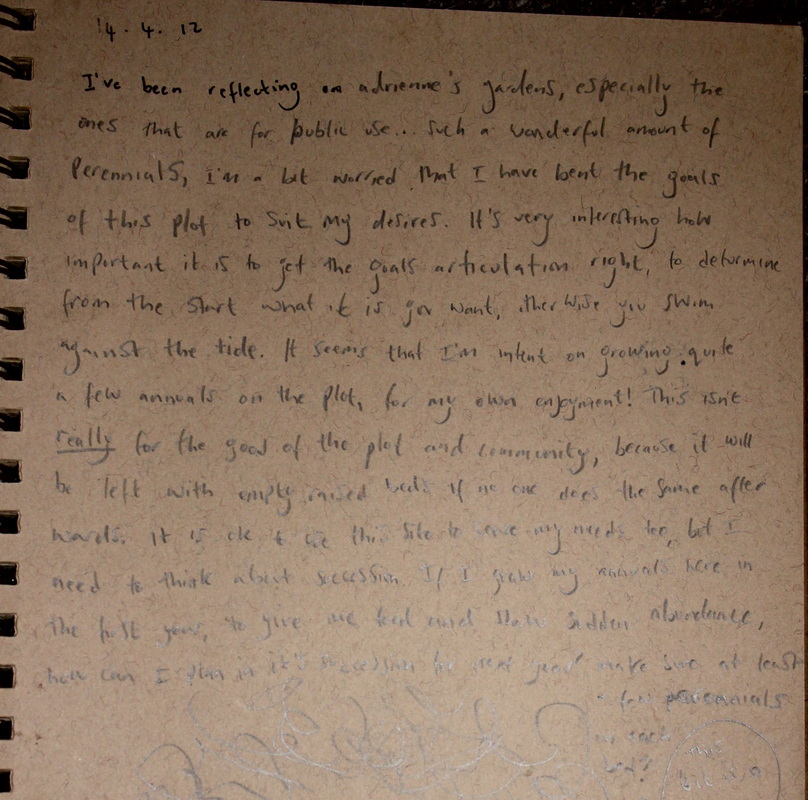
We were taught that to save energy it is very important to extract the truth in the goals articulation section, at this point I realized that I had missed the fact that I wanted to grow annuals for myself, and instead found it emerging in my design, as you would! Luckily I spotted this and realized that it would fit into succession if I embraced it and designed the perennial plants around this. Meaning that I could stack functions by filling up the beds on the first year when perennials were small and supplying myself and helpers with some food for our work. |
|
Design
Pattern to Detail
I had to get my design into Matthew quite soon after we met, and he didn't require as much detail as I would, so I created this prezi as an initial pitch, it is simple but displays my thinking at this point.
I had to get my design into Matthew quite soon after we met, and he didn't require as much detail as I would, so I created this prezi as an initial pitch, it is simple but displays my thinking at this point.
Plot 160... on Prezi
Concept
Gather Round growing space is different to a community garden. It has been created with succession in mind, so that it can develop organically to regenerate a previously unused and sparse area of land. The foundations of the growing space are that of perennial plants that work together to form a self sustaining system as much as possible.
It's chief purpose is to be a place of calm and abundance, a space to allow growing space for the individual, for wonder about nature surrounded by edible and useful plants. Based on Permaculture design, this can become a place for get-togethers of locals, workshops and meetings extending to the flat area below. I hope that this will inspire ownership by many so that it can be easily taken care of by whoever feels moved to do so. A forum will be set up so that ideas and concerns can be shared, as well as a physical notice board for those who are less concerned by the internet. I hope this will be a place that can be enjoyed by the younger people of the surrounding estate, in fact I believe they need a space like this more than most, this is a shared place so we'll see how that goes down....
A garden of contemplation, an area to enjoy as it grows in abundance each year as the ratio of perennial plants take over annual. The apple tree will grow and maybe we can have a lot more shareable food in the future! Please visit and enjoy.
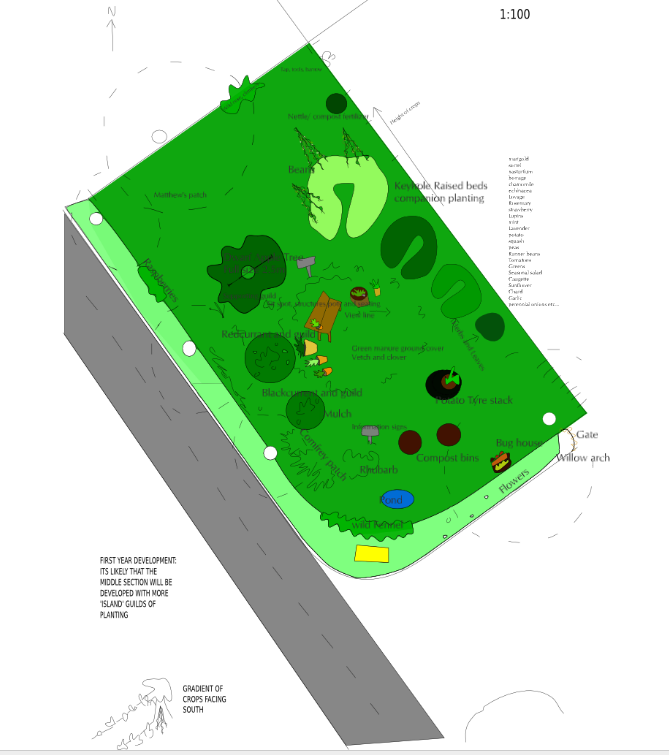
More perennial plants have been added to the design since this was made, and an extra fruit tree above the fourth bed.
My design is based on ideas of a forest garden, with succession and the gradient height of plants imitating the edge of natural woodland. "A forest garden is a food-producing garden, based on the model of a natural woodland or forest. It is usually made up of fruit and nut trees, fruit bushes, perennial vegetables and herbs. It can be tailored to fit any space from a tiny back yard to a large rural garden." Patrick Whitefield, How to make a Forest Garden
PASTE sheet (Plants, Animals, Structures, Tools, Events)
Plants
|
The beds-
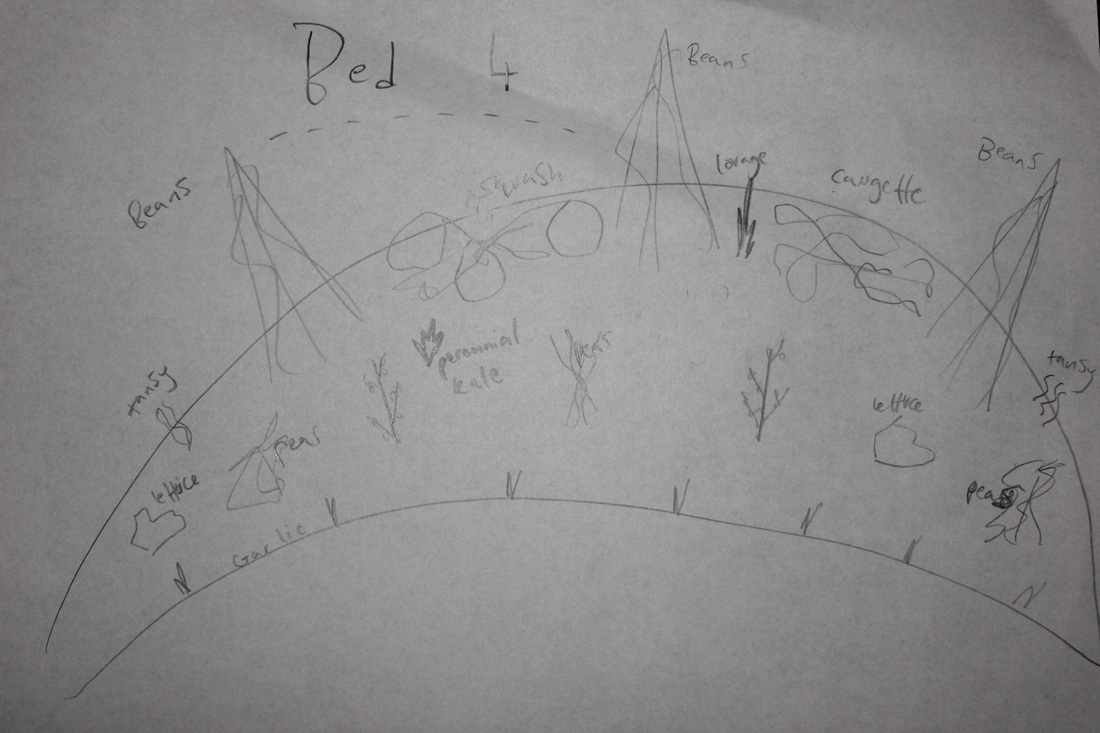
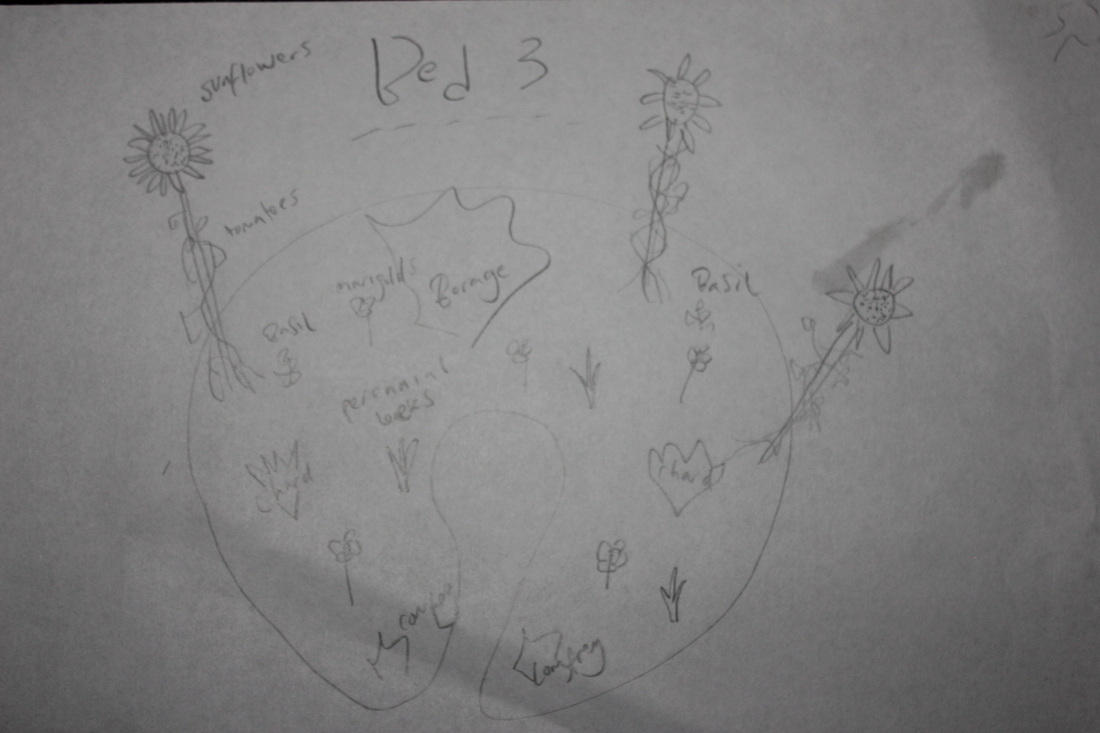
I have tried to companion plant as much as possible, I have also aimed to aid succession and the possibility of non-maintenance by putting at least two perennials in each bed. From places I have visited I have managed to get hold of nearly all my perennial plants, I’m excited about these, but hope to have got a good mix of perennial and annual starter plants. Bed four Beans- nitrogen fixers, edible, attracts insects Squash and courgette- edible, work well with beans, different growing level Tansy- insect repellant, medicinal, flavoring dishes, companion to squash, high potassium for compost Peas-nitrogen fixers, edible shoots and pods, flowers Perennial Kale-Culinary, Lovage- small in first year, culinary, beneficial to other plants attracts insects Lupins- Nitrogen fixer, nectary, attracts insects, mineral accumulator Garlic- dissuade pests, culinary, different root level, companion with brassicas Currant- edible fruit, wildlife, nectary, if space! Perennials- Tansy, kale, lupins, lovage and currant Bed three Sunflowers-Edible seeds, climber for tomatoes, deters aphids Tomatoes-Edible fruit Borage- bee plant, medicinal, used in salads, companion plant for esp. tomatoes, deters pests, mulch Basil- improves growth and flavour of tomatoes Perennial leeks- Edible, repels insects Chard-shade loving, edible leaves Comfrey- mineral accumulator, medicinal, mulch, bee plant Perennials-Comfrey, Marigolds (hopefully!) Perennial leeks, Borrage (self seeds) Bed two Perennial onions- helps strawberries fight disease, culinary, confuses pests Sorrel-Edible leaves, companion to strawberries, mineral accumulator Strawberries- ground cover, edible fruit, attracts insects Kale-companion to strawberries, edible leaves, Perennial- onions, strawberries, sorrel Bed One Herb bed Mint- used in cooking and teas, aromatic, attracts insects Thyme- used in cooking, aromatic, attracts insects Echinacea- medicinal, tap rooted Lemon balm- Nitrogen fixer, used in teas, aromatic, ground cover Chamomile- for teas, medicinal, benefits other plants, adds nutrients to soil Sit-spot Ground cover- clover and vetch Boxes- chives, coriander, lettuce Forget-me-knot Rosemary Climbers up poles – Annual sweet pea succeeded by perennial Wildlife edge comfrey, feverfew, red valerian, periwinkle and violets, wild garlic, wild mustard, dog rose and hop climbing up fence Apple Tree Lemon balm- ground cover, nitrogen fixer, aromatic, protective, leaves for tea Sweet cicely- mineral accumulator taproot, edible leaves Gooseberry- bee plant, mid level, edible fruit Chives- prevents apple scab, insect plant, culinary use Lavender- aromatic, medicinal, culinary Pear Tree Comfrey- mineral accumulator, medicinal Lupin- nitrogen fixer, insect plant Strawberry- ground cover, edible fruit Mint- aromatic, used in teas and cooking Lovage- attracts beneficial insects, deep rooted Outside entrance Fennel- edible, attracts beneficial insects into site, loose screen but lets light in Morning Glory- attracts insects, looks inviting, climbs fence Raspberries- shelter for creatures, doesn't matter if spreads, edible fruits, windbreak Edge of raised beds Rhubarb- Mineral accumulator, ground cover, mulch, edible crop "a guild then, is a harmonious assembly of species clustered round a central species (plant or animal) The assembly acts in relation to the element to assist it's health, or buffer adverse environmental effects." Permaculture Designers Manual It is the arrangement of the parts that make the system work or not and how they function to assist each other, this can be selected and created.... "a human made assembly that mimics a natural community" - Toby Hemenway Gaia's Garden |

An incredibly accessible resource for choosing plants, very useful in this process
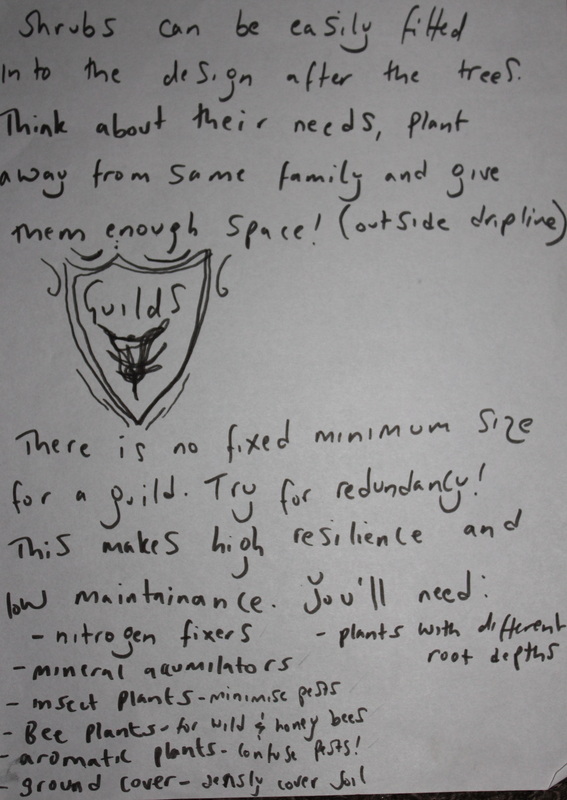
Looking at guilds, and the elements needed to perform different functions
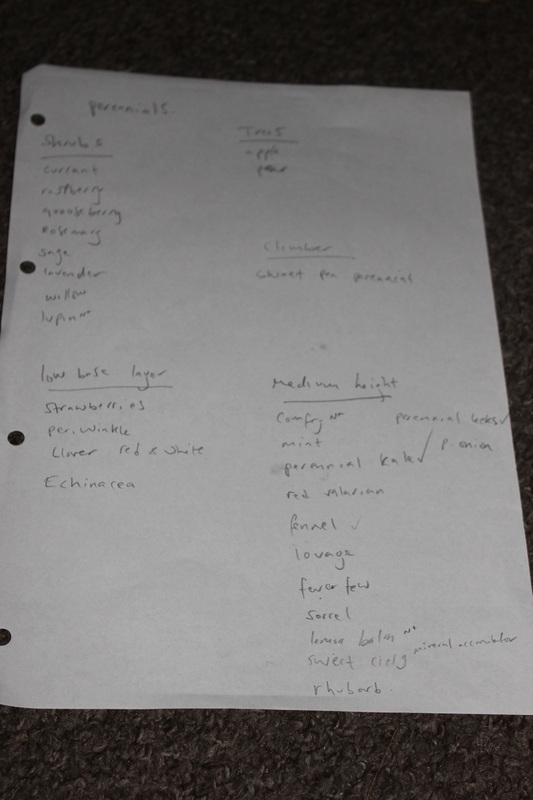
I slowly built up lists of the plants I needed, and ordered them into planting times, where to plant and perennial or annual so that I could begin to design implementation

|
Animals
Plants and structures are chosen and positioned to attract insects. Nectary and scented plants, wild fruit trees are being left around the edge to attract birds to them and hopefully keep fruit and veg safe. Wild area with wood piles, bug house and bird bath to provide haven away from humans.
Structures
I have been offered a shed!
Create a willow arch from the willow that is there (see appendix)
A structure for the sweet peas to climb, and beans possibly chestnut poles, in local woods
Bug hotel- built from found items
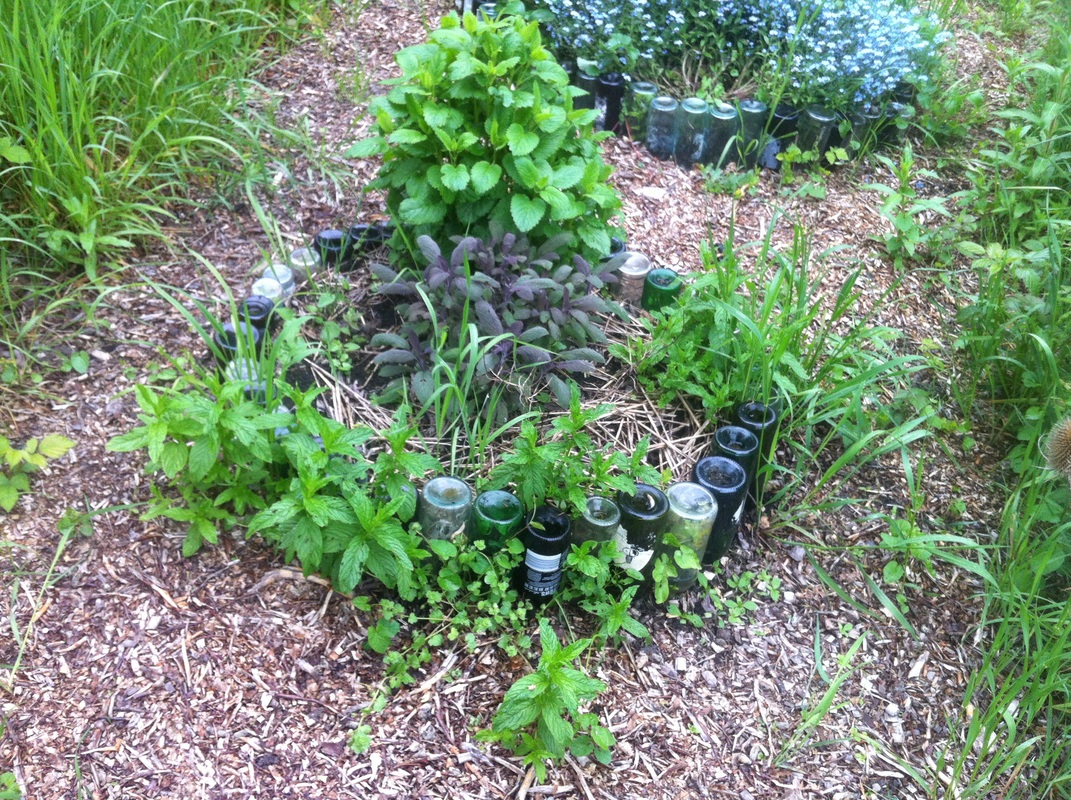
Raised beds created out of wine bottles
Bench or stools, found or made of trunks of cut down trees
Water collection system- a water butt attached to the garage guttering
Compost- at the moment I have a bin, but have been offered pallets, the possibility of putting two bays in...?
Create a willow arch from the willow that is there (see appendix)
A structure for the sweet peas to climb, and beans possibly chestnut poles, in local woods
Bug hotel- built from found items
Raised beds created out of wine bottles
Bench or stools, found or made of trunks of cut down trees
Water collection system- a water butt attached to the garage guttering
Compost- at the moment I have a bin, but have been offered pallets, the possibility of putting two bays in...?
Tools
I have been given many tools including
fork
spade
loppers
barrow
I need a watering can....
fork
spade
loppers
barrow
I need a watering can....
Events
A weekend day or two for doing the large jobs such as...the green manure, planting and creating the raised beds. Will do a BBQ afterwards! I have been contacted by people who would enjoy this.
This section is to be fully completed in the next few months, at the moment, many questions... possibilities ...
Events will be key to showing people what this space is about
What kind of event do I need to do to introduce the community to the space?
I need to think about ownership...are they allowed to just come and sit in whenever they like? Can anyone take the produce? Or should I use it for events? How am I going to make it so people care about it? How will I ensure it's upkeep? Is this for community to enjoy or is it my garden that people can come to when invited? Need to sum up precisely what this space is for the community, it's a place to come and see things growing, and enjoy it. To learn about what's going on. It really needs to go hand in hand with something...a blog perhaps, or even just a facebook page, just photos of what's happening and a twitter for awesome links, quick and easy to set up.
Kids event...making a piece of art for the garden based on the surroundings, stories around the fire, nature awareness day.
Can people hold their own events here? I'd like that?
I can do an article for Viva Lewes about this which I think will go down well.
Pattern to detail Sit spot This area of the garden is the main part that distinguishes my design from many of the other community gardens of the town. It's detail I am intending to design in the next stage. I will be making a mood board of ideas and visiting gardens such as the peace garden at imperial war museum, the forest farm peace garden and Dalston curve garden, to create a space that is beautiful, creative and sacred yet accessible for all. I am inspired by this book "Religion for Atheists", it brings to mind traditions and rituals that bring people together and are often associated with religion but needn't be confined to that. I am very interested in alters, ritual spots etc that are not intimidating and merge with the modern person. I'm also inspired by this quote from permanent culture now: "So how do you create connections with nature? This sounds hard, but really, the hard work has been done over millennia of evolution: the beauty in nature’s patterns and designs will become self evident. All we really need is a moment of clarity, to glimpse natural order and make sense of what is popularly misunderstood. People do not realise that in our best estimates, humans existed as we are today, nearly 200 000 years ago. Nature is still our spiritual homeland despite the recent emergence of industrial cities. By introducing a range of habitats and microclimates, wildlife will flourish to bring the scents, sights and sounds of nature closer to home." |

|
The why's....
I spent a lot of time looking at my different choices etc and so here are a few examples of how I came to certain decisions of the design through research and observation, you'll find more workings in the appendix
Green manure / cover crop
I have decided that to condition the soil I will plant a thick (to deter the couch grass and brambles) layer of clover and vetch. As I want to get this done this year I will have to dig out the grass and it's roots before sewing this cover crop. If I had more time I would cover the whole area with a thick layer of cardboard for a year to suppress them meaning less work. But this is also inappropriate as the area is overlooked by people who may not understand or find it unsightly!
After some research I have decided that I won't be digging this in before it flowers like a green manure but I will sew it thickly as a cover crop and cut and drop for mulch. This means a few things for the succession of the garden:
-If completely left, the vetch and clover will be an attractive meadow type crop
-I can cut and drop, and make it easy for people to do so in the future, improving the soil more slowly and providing a lasting nitrogen supply for other plants
-If more shrubs are to take over the space in future, I can plant them into the ground cover, giving them a happy home
I first discovered this method for myself volunteering at valis veg (see photos on volunteer page) and have read more about the benefits to come to this decision (see appendix)
It is vital that plants and systems to supply nutrients be factored into my design because I am selecting plants and assembling them in a way that may not naturally occur: "We're pulling products out of the ecosystems loops, thus we need to replace what we've withdrawn by importing nutrients, be them nitrogen fixers, as well as mulch and nutrient accumulators " Toby Hemenway Gaia's Garden
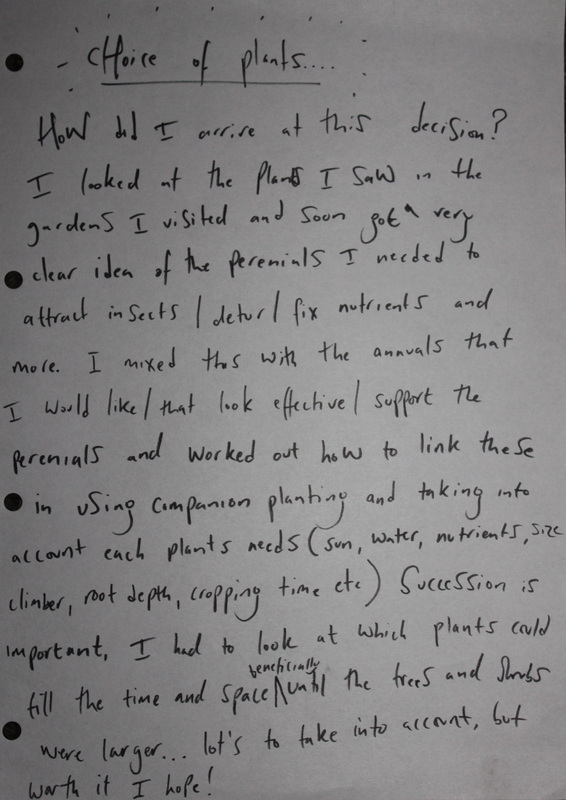
How and why I chose the plants that I did...
The design -pattern
The design is based on circles, waves and islands to create more edge.
At the moment it is quite spaced for areas to be filled in with perennial crops depending on what happens in the future, stacking in time, redundancy.
The design is in a pattern of height imitating a forest edge, it faces south with the highest plants and trees at the back
The centre is where people naturally come to when they enter the space, I have made this the main social area therefore.
...to detail
Here is a look at the workings that I used as a path from the sector analysis to placing the finer details of what, where and how. I looked at their characteristics and how they fit in the zones, then through my research and visits to gardens put together a basic idea for each area.
Bed one-
This is the first you encounter, it gets quite a bit of sun and attention as it will be the first one you see. However I want it to always look good so I think I'll make it a low maintenance herb bed. A beautiful sweet introduction to the garden
To make this bed I will need to:
Mark out the bed and all the others too. -How? Sticks? String? Then dig out the grass in the spiral shape, loosen the soil and push in the bottles. Then fill the bed with cardboard, soil and manure. Cover with straw-not too much, and plant into it as per the design.
Meanwhile propagate the plants back at the house ready for planting up the bed.
Bed Two-
This bed will be semi-perennial with the view to becoming fully so. It will predominantly be planted up with strawberries, because everyone likes strawberries, a great perennial choice as I've seen in many permaculture gardens! Interplanted with leaves. Perhaps in future there will be asparagus in this bed too...? This bed is beautiful and edible!
To make this I will need to:
As above. Sew lettuce, marigold and greens seeds. Try to find strawberries wherever I can so I needn't buy plants!
Bed Three-
This bed gets more sun, but further towards the north side of the garden. It will be a bed for growing upwards...this is an optimum sun spot so tomatoes are ideal here.
To do this I will need to:
As above, get tomatoes going at home, put sunflower seeds (more than needed incase they fail) in and plant around them, find the perennials.
Bed four-
The far end this will be the highest bed in crop size so to not out shelter the rest, I am putting legumes in here to really nourish the soil as the fruit bush will need it, the fruit bush is next up in the succession height mid level.
Fruit trees-
This spot is at the back of (my area to matthew's) of the garden. It is fairly sloped but gets sun until around 6pm in the summer. The
trees will slowly over the years become the main feature of the garden, and hopefully be joined by another. It is showing that fruit trees are important and are not hard work. The tree islands will show guild planting techniques taking care to design to the maximum size of the tree and to the drip line
To create this we need to:
Carefully map out not only positioning based on what amount of light etc the plant needs but also carefully work out spacing in terms of how big the pant is going to get and what it needs in terms of support from other plants. Carefully research what trees would thrive in this soil and area. Clear grass.
Fruit bushes-
This area is at the back, least visited and sloped. It is slightly shady so currant bushes wont mind this so much...they need less attention than the annual plants which will be on the flatter level. This will be an area like the mid level growth of a food forest, fruit bushes surrounded by complimentary plants.
To do this we need to: Get hold of cuttings in autumn, prepare the ground nicely beforehand and plant up a nice support guild.
Sit spot-
This area is the place that you walk into when you enter the site, in the middle, it has a well worn path to it. There is a nice view of the sky here but also it is the area with the poorest soil as there is not even any grass or brambles growing on it. It will be like the lawn area, planted up with green manure to improve the soil. This will be the stop point on the site, with space for annuals in pots and a fire.
The sit spot contains:
To make this we need to:
Firstly mow the area twice, dig it over, spread green manure seed and rake (just before it rains, see video here) put structures in, willow (details) and bean poles. Sew up pots, (will be doing from beginning)
Wild area-
This area is the steepest part and very shaded by the willow tree. It is a bramble spot. Not much can be grown here and so it will be a space left for insects and shade loving plants. I will try to introduce some ground cover that insects will like, as well as comfrey.
To create this we need to: Cut down and dig up / mulch the brambles a bit, plant up in sections and mulch heavily around these plants, put in wood piles and hidey places for bugs
Edge-
This is the curb area outside of the plot, it is the introduction to the site for humans and creatures, it needs to be inviting. It gets the most sunlight and the soil is pretty good. However it is for this reason prone to the overtaking of pioneer species, small trees and brambles. So I will be planting it with things that are attractive but do not require too much upkeep, plants that have the ability to let sunlight in but also travel and self replicate. Fennel would therefore do well here as it is an allopathic but it will be away from other plants, it will create a soft screen but not too much shade, and hopefully invite beneficial insects into the site via the wild area. I will also plant a few flowers and raspberries on the west edge. It will be the inviting and lush exterior, by doing this I also I can dissuade people from dumping rubbish here.
To make this we need to:
Firstly take out any plants that are restricting light and not highly necessary. Brambles leave a few, yellow plant let flower then cut right back, plum prune. Cut Right back the branches of the ash ans sycamore as they are taking water from the middle of the site. Cut off the ivy to release the wild rose. Prune the willow to use the branches.
Implement
I need to develop a strategy of implementation. A strategy is a "pattern of response to the elements of the environment that are likely to be experienced in that habitat" (Permaculture designers manual)
My strategy is how I respond to the observed environment based on my final goals, then how I will respond to the resulting feedback of the system after implementing changes....
My strategy is how I respond to the observed environment based on my final goals, then how I will respond to the resulting feedback of the system after implementing changes....
|
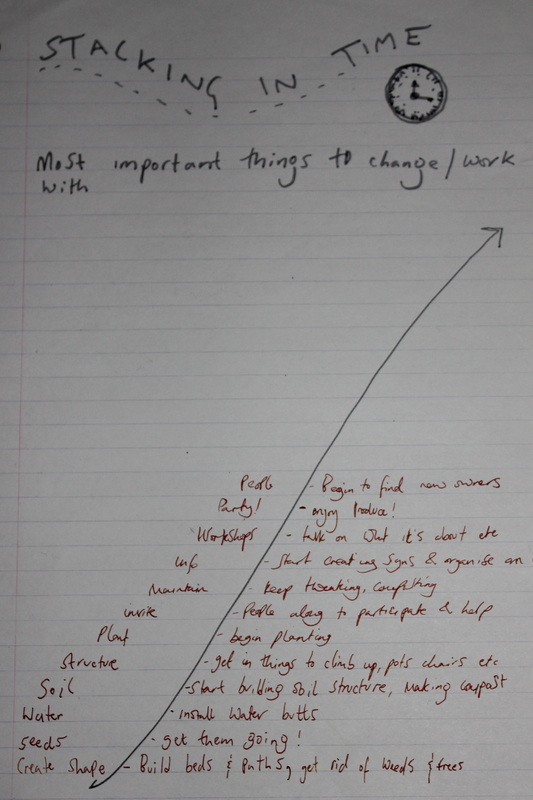
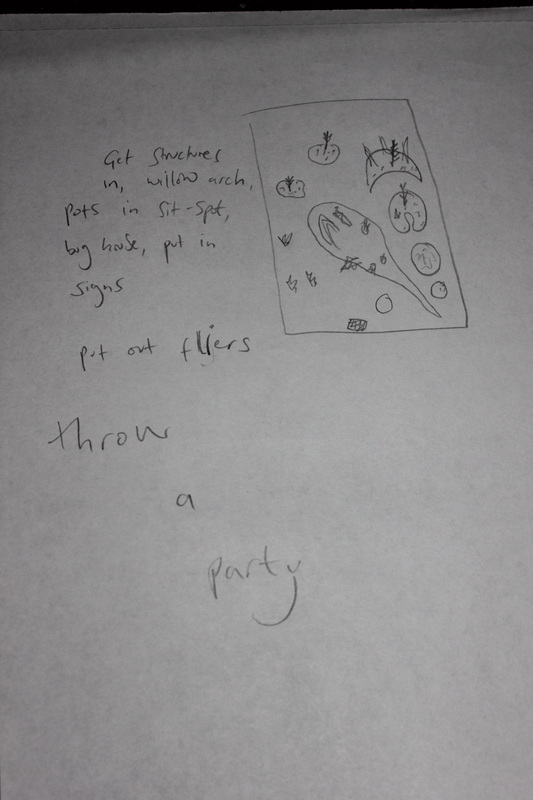
Now that I know what everything will beI need to think about stacking in time. What are the most important things to start with? Clearing Trees and brambles around the edge to let in light- get someone with a chain saw? Get ivy off of fence and rose Order compost, get poo and straw in access This is fine but mark out main paths through and the beds ready to create structures Build raised beds, mulch, fill with card, soil, poo, straw Put up support for peas Find area for compost bin and weeds Pond, bug hotel, less important Put in willow for arbour Supplies - water Find water butt and install Building soil and growing space Start planting in raised beds dig ground and plant ground cover BY MAY Planting Aesthetics Design the details of sacred space Community, events READY FOR THIS BY AUGUST During all this time I need to be gathering plants and resources, propagating seeds and cuttings and developing my communications with locals, that is linked with my work on my website. |
|

visualizing the basic overview of implementation
|
|
Of course I'm already implimenting as I write the design section because the season is moving on and there are seeds to be sewing so that I get it all in time...
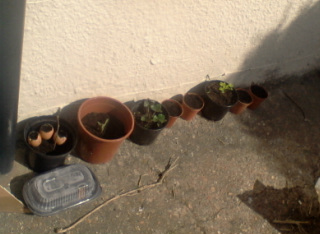
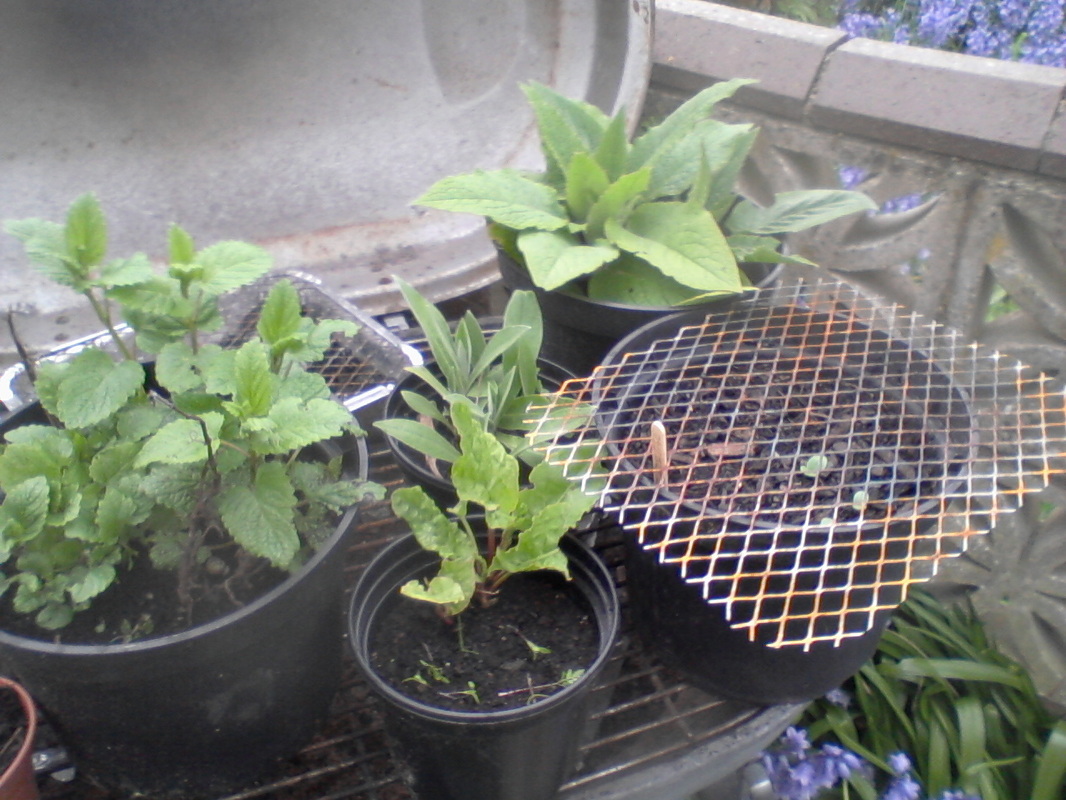
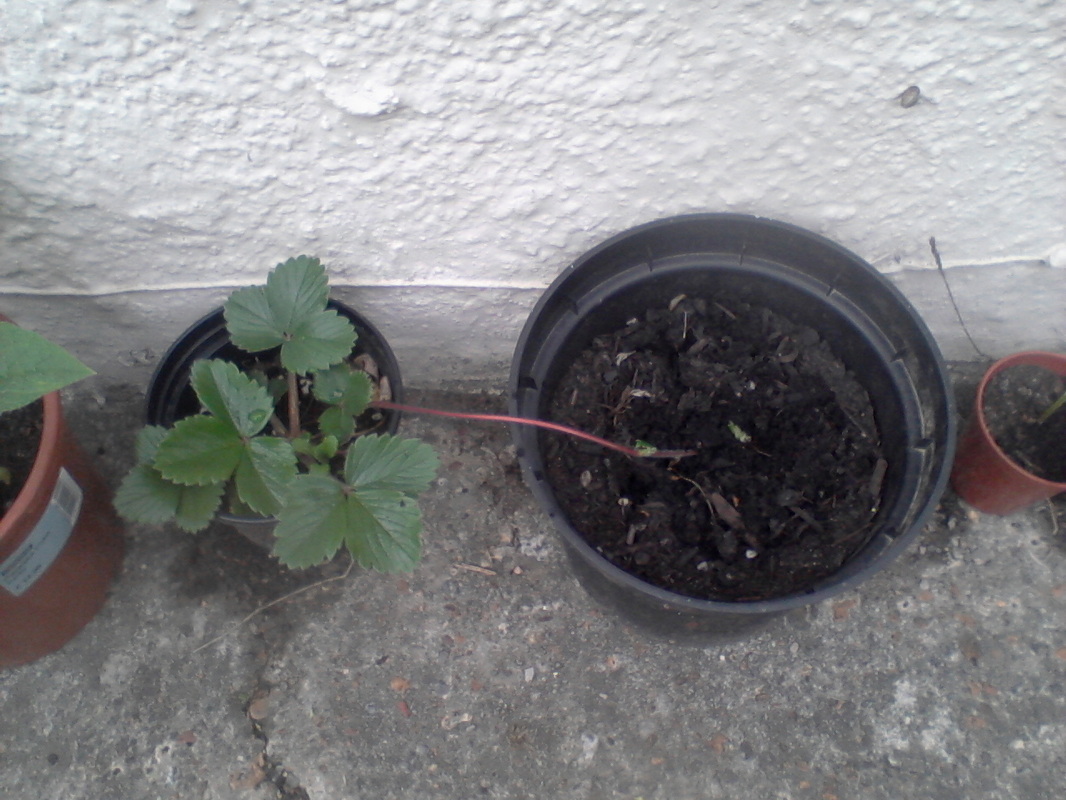
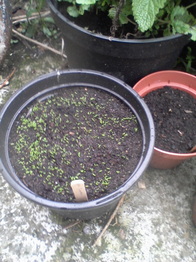
Trying things out....we have a take-away tub with salad in, egg shells with marigolds, a rescued autumn raspberry, comfrey, a rescued strawberry, garlic trials, and a hop cutting
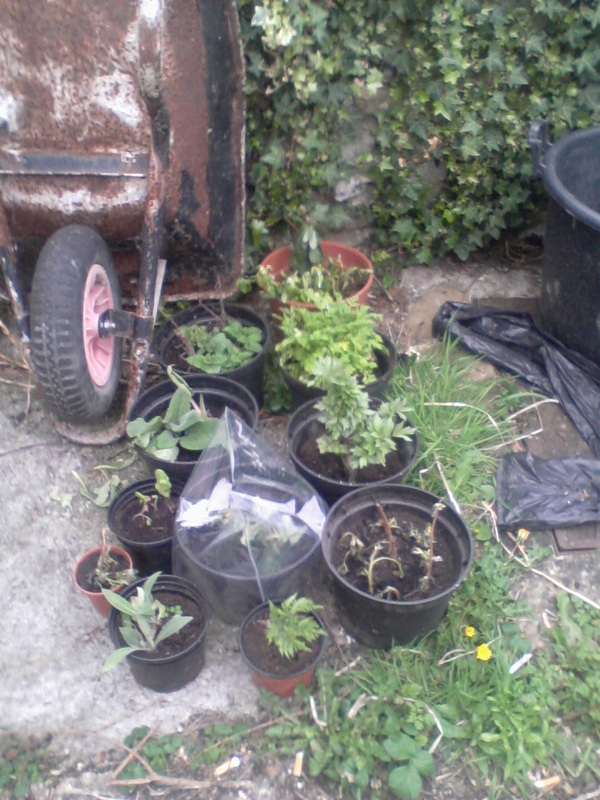
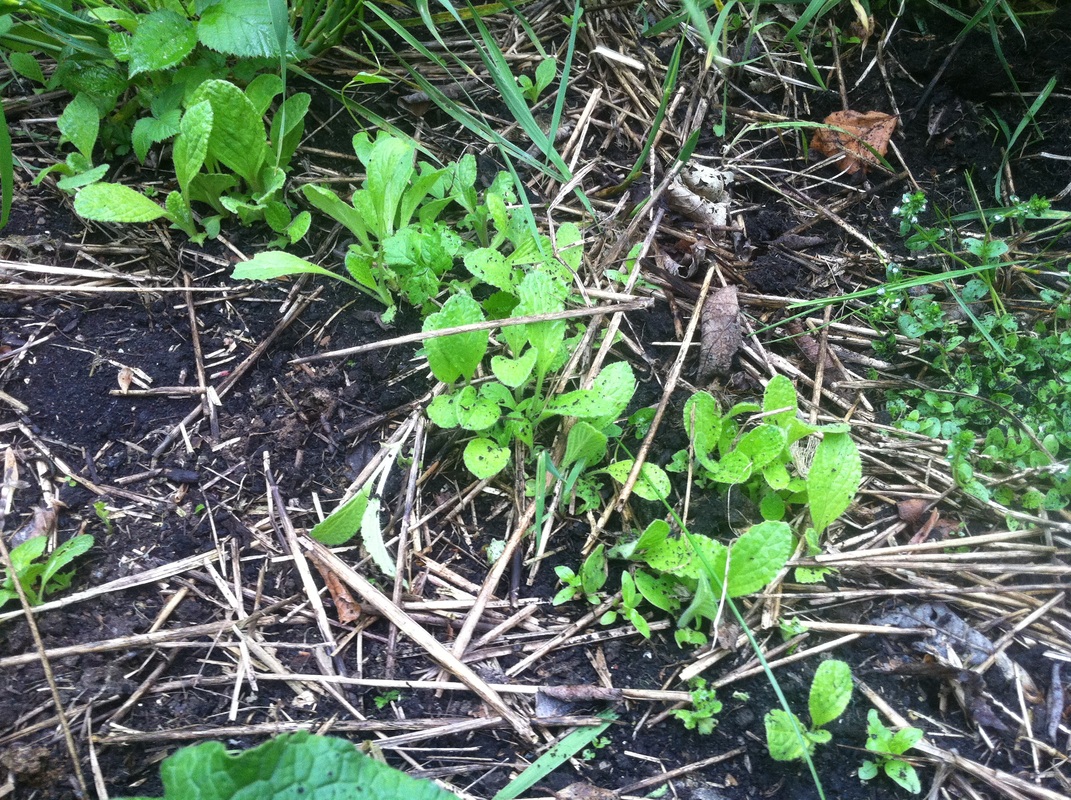
Great stuff, some perennial plants from my granddads garden, comfrey, feverfew, sorrel, strawberries and more. Unfortunately a few of them aren't taking too well to being transplanted. I'll ask about this...
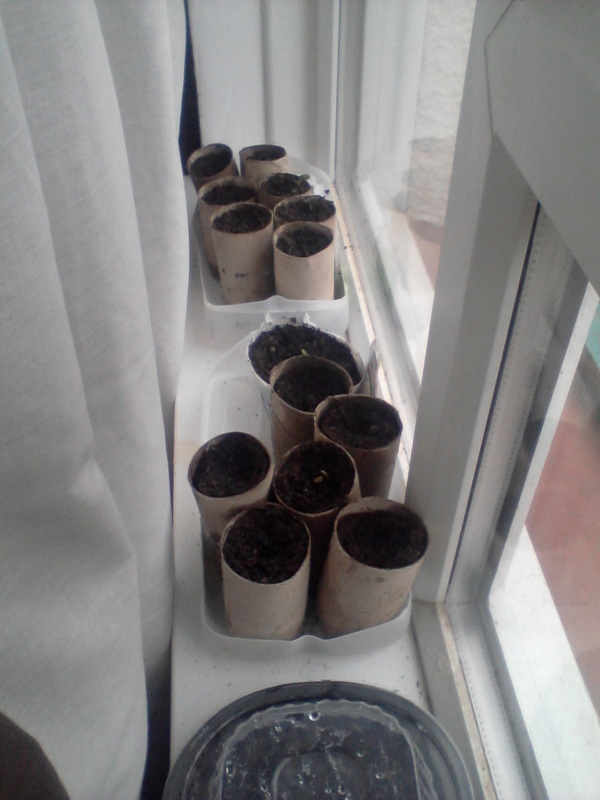
I'm using any containers I can find for my seedlings... toilet rolls are great because they don't take up too much room and I can pop them straight in the ground.
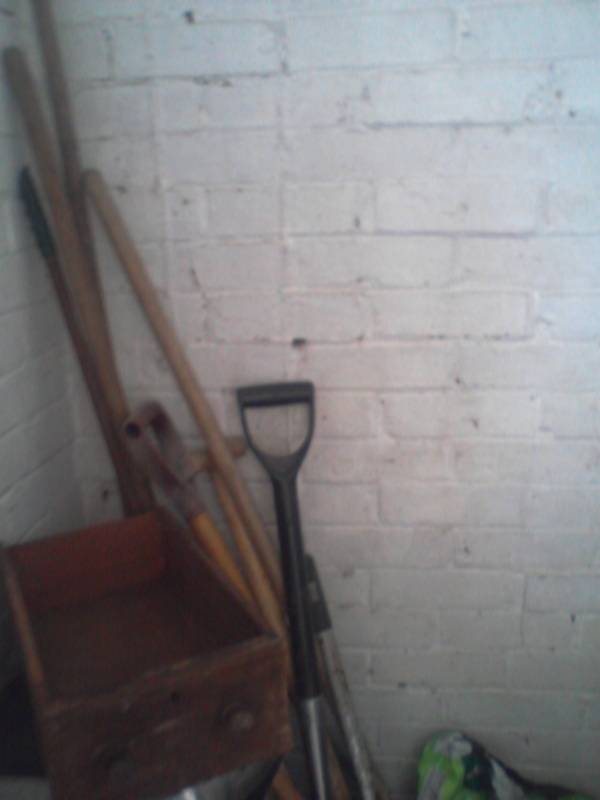
Peter the gardner gave me lots of lovely tools...and I found some beautiful draws dumped down the road...these are going to be great to plant in!
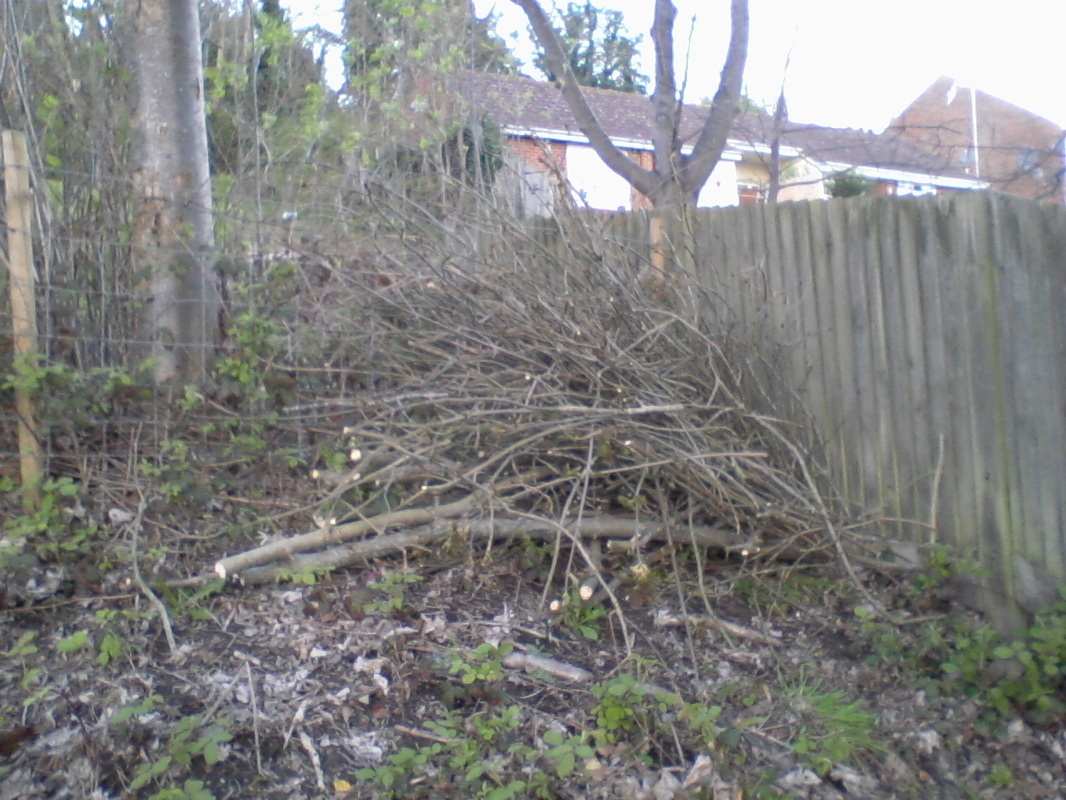
Making little wood piles around the edges I hope to create safe spots for creatures and insects, as I am taking away the bush of brambles around the perimeter
The first raised bed under way! Putting the grass I pulled out in the centre I hope to add to the mulch and nutrients a little..
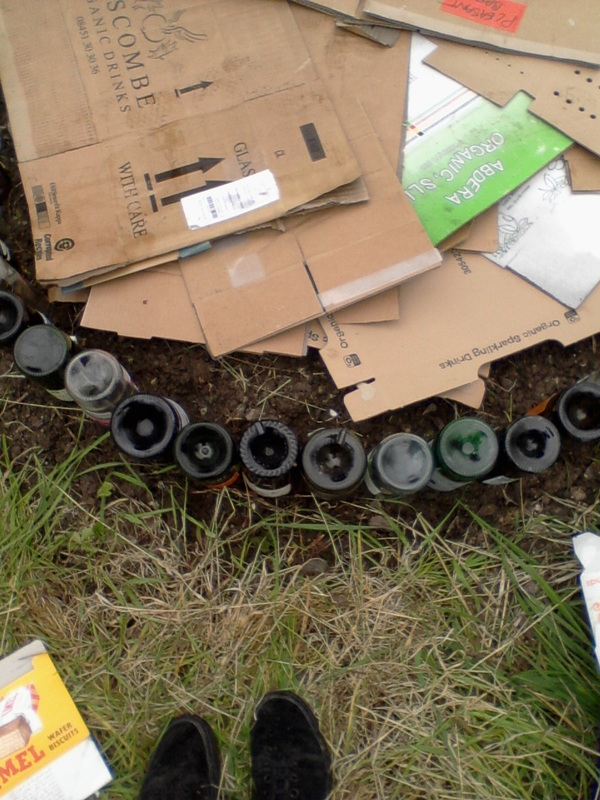
I removed the grass wider than the bottles as the cardboard cannot go flush to the bottles
Then compost
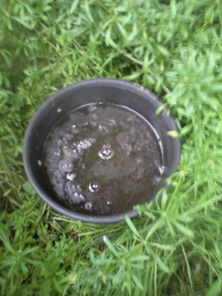
nettle fertilizer in progress...
Borage, sorrel, comfrey, valerian, lemon balm
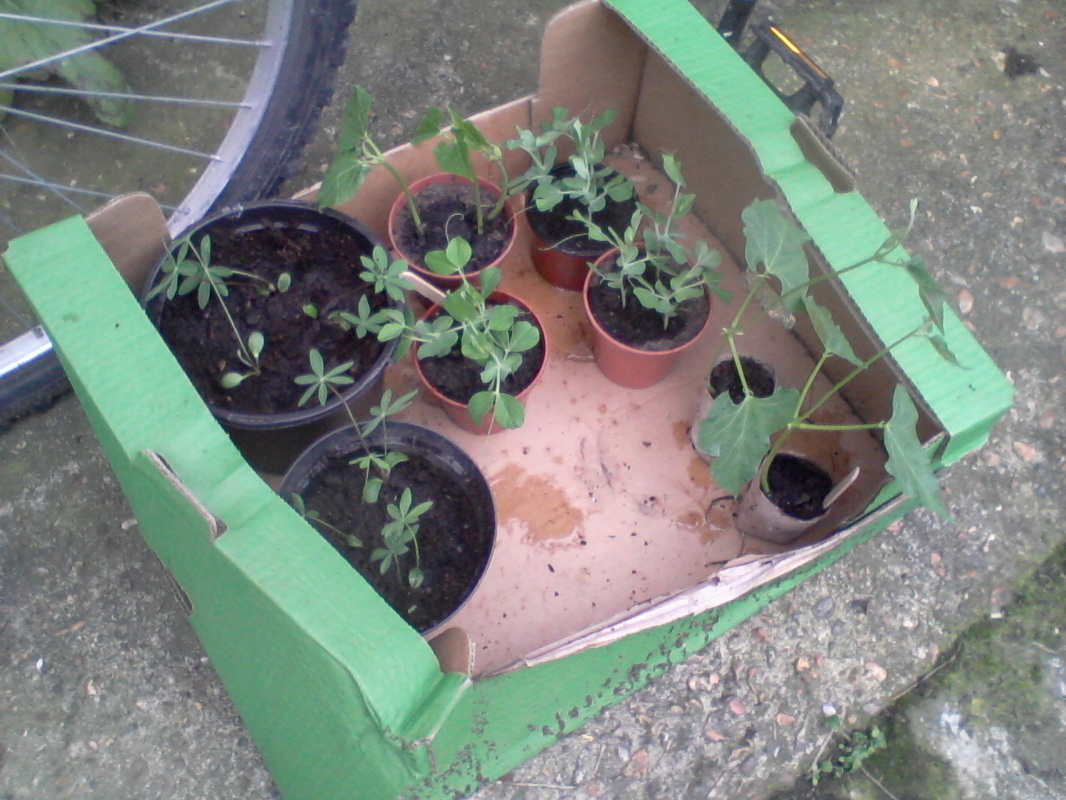
My beans peas and lupins are ready for the beds...better get on!!
|

Chili peppers and tomatoes. With the obligatory spring sticky bud, and my hop cutting in the foreground.
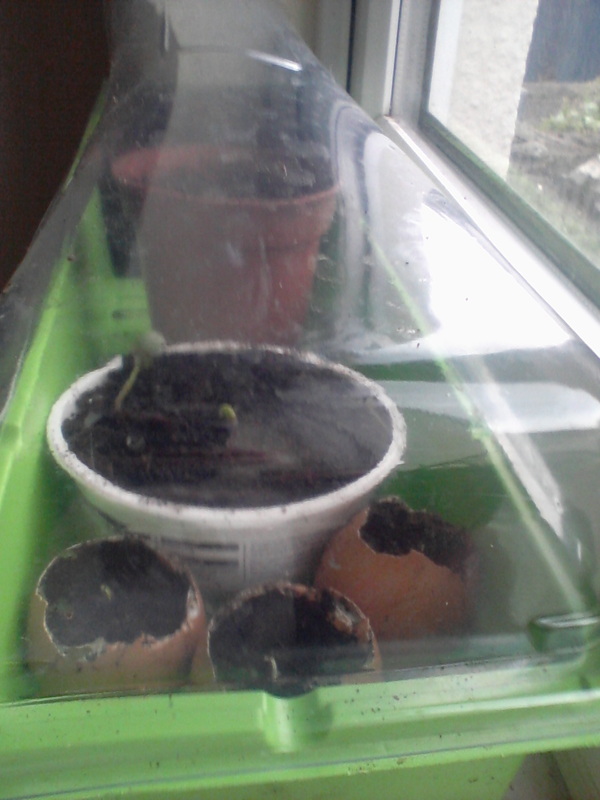
Windowsill propagator...

A take-away pot rescued from the bin...perfect seed propagator!
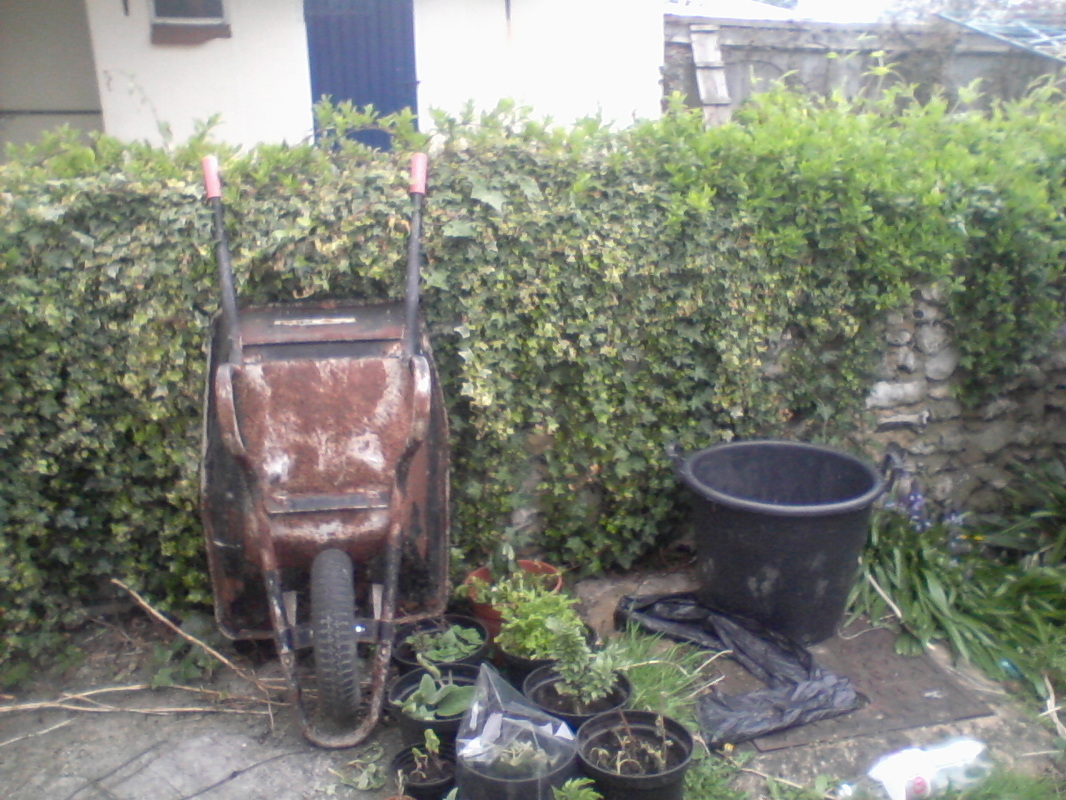
I'm so lucky to have been given a working wheelbarrow and big bucket!


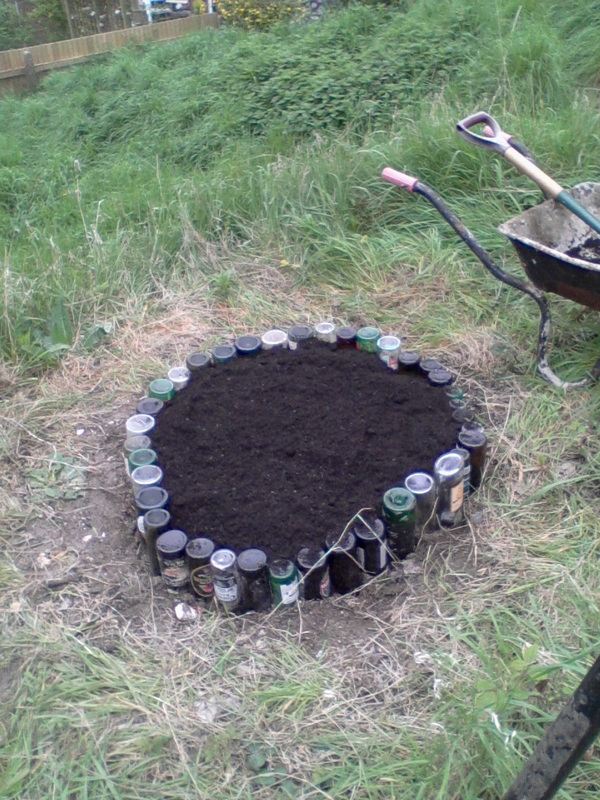
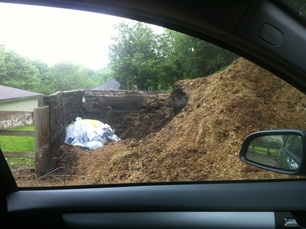
The compost is delivered! It's lovely colour and hot hot hot inside!

Cardboard first

Then manure
A broad bean experiment among the weeds
helping a strawb stretch it's legs
chamomile
|
Maintain
I am going to check back into this section whilst I am implementing the design. I have tried to create a site that requires less maintenance than normal gardens, among other things planting a lot of mulch plants to cut and drop, creating succession and using raised beds to keep out weeds. It will be interesting looking at things that will need to be done to maintain the site, I will learn that a lot from my work with pippa. It may be an interesting thing to write up suggested maintenance ideas for the people who look after it next.
Evaluate
This whole process is an evaluation, because everything is so new to me. For example I went to prototype a raised bed…just try it out, and learned so much (mostly through not having everything I needed!) Such a lot of it is about timing, about having the right things available at the right times, being flexible to the needs of ever growing seedlings and unpredictable weather, I'm learning I need to go forward with things with confidence and a LOT of discipline.
- Feedback was that I needed to do a final detailed drawing of the design so that I could really feel into it...taking into account the final sizings etc This will be a colourful diagram showing the permaculture principals used so that I can upload it onto my public web site
What has gone well?
The things I am very proud of are:
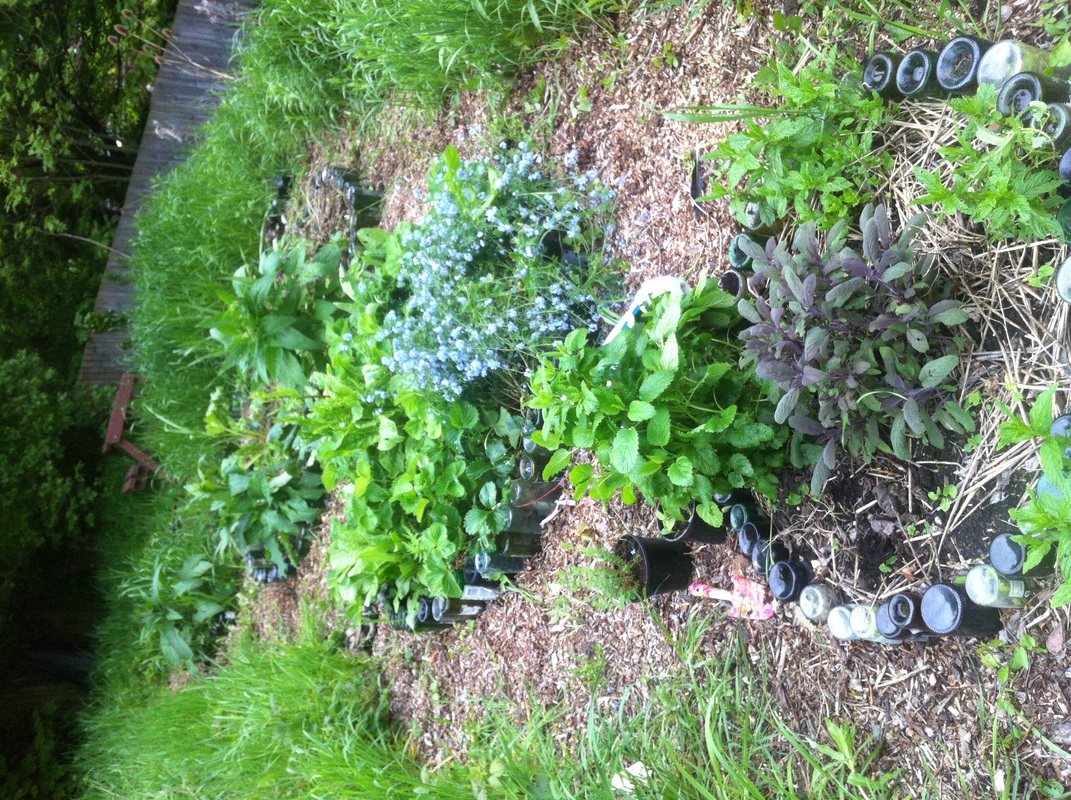
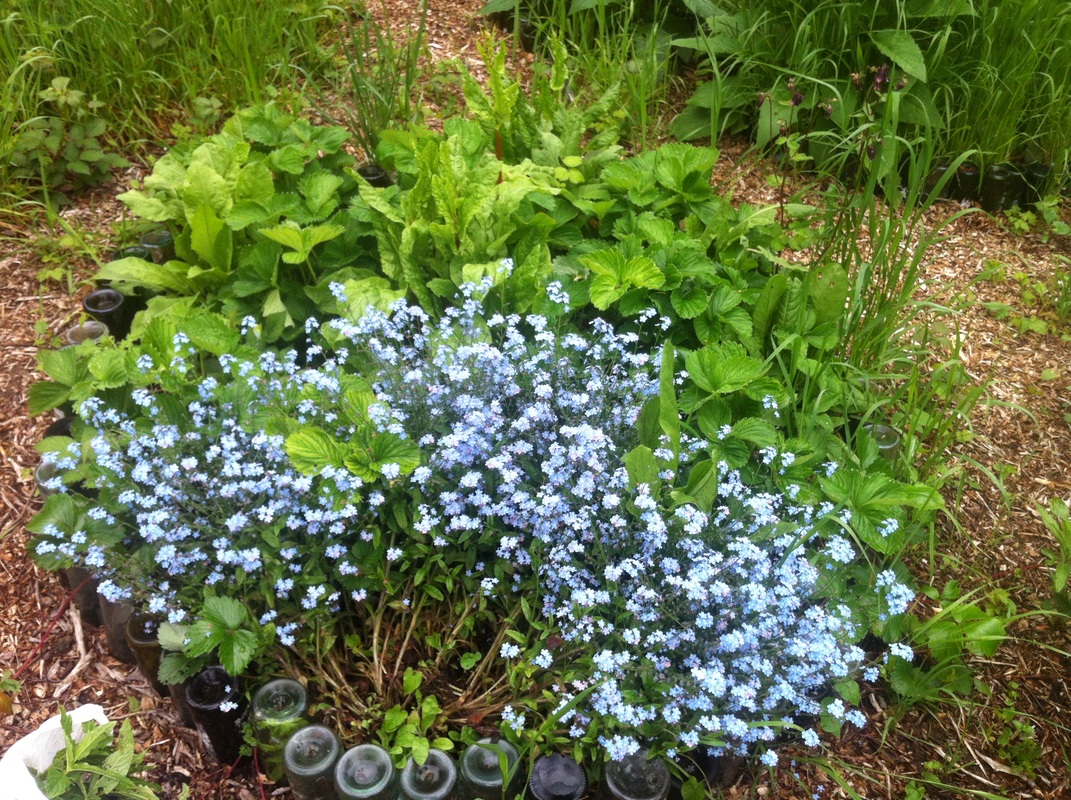
The bottle beds look really good, and they are well positioned for light and water. My mentor said to focus on a small section and get that done, even though I planned more than that I feel like I achieved that at least.
The perennial plants are the strongest and most abundant. I loved realising that the things that grew the best were plants that were dug up easily from my grandads garden and plonked in the ground. Of all the seeds I spent money and time on this was the best. It shows me that these are native plants that are happy to grow abundantly and law of least effort says that's the permaculture way! Also I find this exciting because the sharing of plants can be really easy, and all you have to do is wait a season before you yourself can pass on plants and keep the system going. I realised it's a good idea just to get these things in, then they can be moved if they're not right there but take off.
My favourite bed has been the strawberry bed, all plants were dug up from wherever I found them. Strawberries just took off and had loads of runners that I spiraled back in and potted up. With sorrel which I really like and grows up like crazy- enough for the slugs to have a bit. Sweet cicely, forget me knots (which I may move when I've a place for them as they've grown SO fast) and because they're pretty and easy growing I popped in an aquilegia which sprung back up lovely. A nice mix, resilient bed, little inputs, will top up with manure and mulch in the spring, but the outputs are food, bee forage, extra strawberry plants from runners to give away, and more.
I am really pleased about my sourcing of wood chip, straw and cardboard, all free and the person was happy for me to take it off their hands. I need to extend that to other resources.
I'm really pleased at how the perennial leeks are coming up, as well as the herbs, borrage etc.
Tools, it was good to get given tools. Really useful and saved me a lot of effort. The scythe is great. And would be great for showing people who visit how it works.
The things I am very proud of are:
The bottle beds look really good, and they are well positioned for light and water. My mentor said to focus on a small section and get that done, even though I planned more than that I feel like I achieved that at least.
The perennial plants are the strongest and most abundant. I loved realising that the things that grew the best were plants that were dug up easily from my grandads garden and plonked in the ground. Of all the seeds I spent money and time on this was the best. It shows me that these are native plants that are happy to grow abundantly and law of least effort says that's the permaculture way! Also I find this exciting because the sharing of plants can be really easy, and all you have to do is wait a season before you yourself can pass on plants and keep the system going. I realised it's a good idea just to get these things in, then they can be moved if they're not right there but take off.
My favourite bed has been the strawberry bed, all plants were dug up from wherever I found them. Strawberries just took off and had loads of runners that I spiraled back in and potted up. With sorrel which I really like and grows up like crazy- enough for the slugs to have a bit. Sweet cicely, forget me knots (which I may move when I've a place for them as they've grown SO fast) and because they're pretty and easy growing I popped in an aquilegia which sprung back up lovely. A nice mix, resilient bed, little inputs, will top up with manure and mulch in the spring, but the outputs are food, bee forage, extra strawberry plants from runners to give away, and more.
I am really pleased about my sourcing of wood chip, straw and cardboard, all free and the person was happy for me to take it off their hands. I need to extend that to other resources.
I'm really pleased at how the perennial leeks are coming up, as well as the herbs, borrage etc.
Tools, it was good to get given tools. Really useful and saved me a lot of effort. The scythe is great. And would be great for showing people who visit how it works.
What has been challenging?
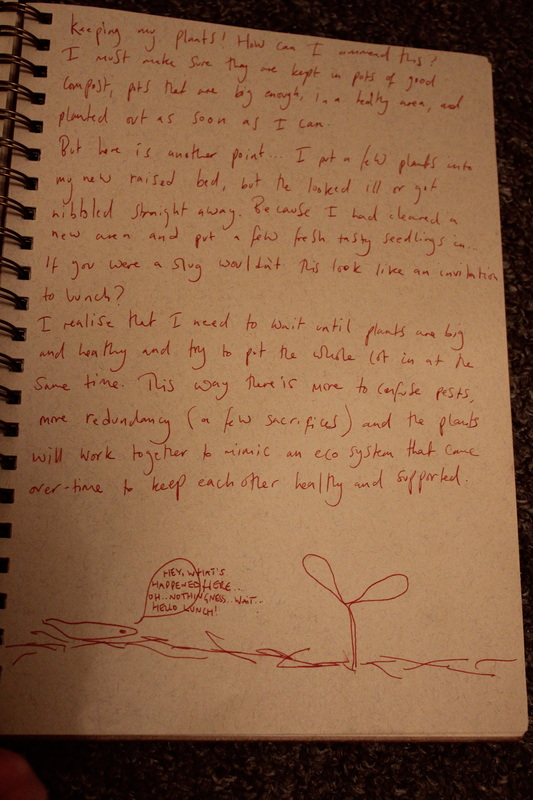
SO much stuff got eaten, including all my Lupins I had so many, nurtured them!
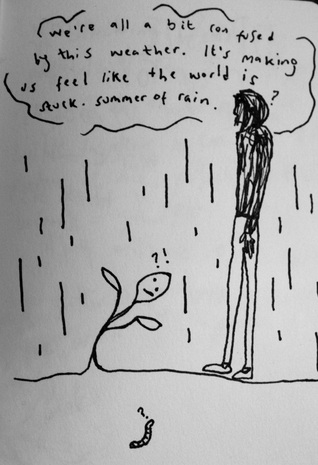
The very rainy weather at a time where I needed to be out in the garden at the start of the summer
My stress about having to 'make it work' my own pressures from within, a lack of courage to ask for help due to fear of what people thought about my decisions. ("you can't live on comfrey" said someone helpfully...)
Finding resources in town such as straw and manure.
Slugs. Slugs. Snails. Slugs. And the lack of will to battle them.
Proximity. I was only a five minute walk away but still this was a problem. It was easy to convince myself things didn't need to be done. I cannot overstate the importance of being there to see things happening, to be able to stroll through the garden and so keep on top of things. Particularly when annuals are involved.
Transporting things around
Keeping up with things growing. I lost a hell of a lot of plants because they didn't get what they needed in time
SO much stuff got eaten, including all my Lupins I had so many, nurtured them!
The very rainy weather at a time where I needed to be out in the garden at the start of the summer
My stress about having to 'make it work' my own pressures from within, a lack of courage to ask for help due to fear of what people thought about my decisions. ("you can't live on comfrey" said someone helpfully...)
Finding resources in town such as straw and manure.
Slugs. Slugs. Snails. Slugs. And the lack of will to battle them.
Proximity. I was only a five minute walk away but still this was a problem. It was easy to convince myself things didn't need to be done. I cannot overstate the importance of being there to see things happening, to be able to stroll through the garden and so keep on top of things. Particularly when annuals are involved.
Transporting things around
Keeping up with things growing. I lost a hell of a lot of plants because they didn't get what they needed in time

Lessons.....
The involvement of annuals in this place that is actually in MY zone 6 is a bad idea...
The whole thing about doing it quickly was in fact a terrible idea, too much pressure and no time to observe and take it slow which permaculture really advises
"small and slow solutions"
I need to learn how to get people involved and get them inspired
getting hold of stuff for gardens in towns is actually pretty hard. Massive elements of permaculture are manure and straw...tricky. Cardboard no problem
What are my renewed visions and goals for this site?
My vision has changed slightly, I think I will be involved for as long as it takes to get this garden to a positive state. I have learned a lot this year and it is an amazing opportunity for me to try stuff out, to fail, to experiment, succeed and be what I am, a learner. I am very lucky.
I have also realized that this is an opportunity to promoting my design skills and I need to use that to the best of my ability, because it's a good chance. Whilst gardening the other day I realised that I am really inspired by making a portfolio of the garden that is totally beautiful and creative. To get a good camera and draw, write, make it brilliant. Using the beautiful aesthetics of the garden and people enjoying it to really showcase what I am doing and how I see it. I want to do a beautiful portrait of my grandfather and show wisdom from my mentors. Photos and writings from my visits. Things I've made in the garden through being inspired. Sculptures. I am here to document and express the interplay between growing food, creativity and people. I want to develop a language based in what I love, to show what I offer but it needs to be specific.
My vision is to have a site that is my experiment for a model, to explore new abilities to bring people together to create something as a whole. A mini version of the type of model that I want to do more of. Can we educate?
What are my next achievable steps?
I need to change the way I work with this site to overcome the problems I have had with visiting and maintaining it.
Get a camera, begin the portfolio properly, draw spirit of the place as I see it for encouragement.
Have a good look at the design and time scale, and re-do for my new goals.
Research about what plants I can put in now, and get cuttings etc
do some research into water systems and other basic systems around the site for Matthew
I want to focus on things that come naturally to me. What are these? Organising. Collaborating. Planning. Creative stuff. Look at WHAT I want from it and HOW to fill the gaps in what I can bring to it with other people and inviting their help
Visit sites that will be inspiring to this
What would help?
Collect a group of people whos interests are in the things that you are not interested in. Make it clear you have no ownership and would like them to totally take charge of that little part of it.
Put up signs. It's very simple.
Urge to just get it to a good state and give to someone else.
Re-evaluation of the goals of the next few seasons, ie getting fruit bushes and trees in
Re-evaluation of goal and purpose. What is it doing for me?
What is my idea for this, what am I passionate about and what are the gaps? Who can I talk to who is not like me?
Extra things to think about....what is the energy of the land? Does it need listening/offering to a little more?
Implementing update
I found a source of manure really close! ..just up the road
I found a source of manure really close! ..just up the road
